创建 Github 拉取请求
本示例说明如何使用 Jenkins 管道从 Port 内部打开 GitHub 仓库中的拉取请求。
工作流程包括在 Terraform 的 "main.tf "文件中添加一个资源块,然后在 GitHub 上生成修改 PR。 在此特定实例中,添加的资源是 Azure 云中的一个存储账户。
- 本指南假定您已拥有 Port 帐户并具备使用 Port 的基本知识。如果您还没有这样做,请继续完成quickstart 。 **设置本指南中将被用于的 "服务 "蓝图。
- 你将需要一个 GitHub 仓库,用来放置本指南中要用到的文件。如果你没有,我们推荐你使用名为 "Port-actions "的creating a new repository 。
- Generic Webhook Trigger - 该插件使 Jenkins 能够根据传入的 HTTP 请求接收和触发作业,从 JSON 或 XML 有效负载中提取数据,并将其作为变量提供。
示例 - 修改 main.tf 以添加资源块
设置动作的前端
- 前往 Port 应用程序中的Self-service tab ,点击 "+ 新操作"。
- Port 中的每个操作都与蓝图直接相关。我们的操作将创建一个与服务关联的资源,并作为服务 CD 流程的一部分进行供应。
从下拉列表中选择 "服务"。
3.此操作不会创建/删除实体,而是对现有实体执行操作。因此,我们将选择 "Day-2 "作为操作类型。
像这样填写表格,然后单击 "下一步":
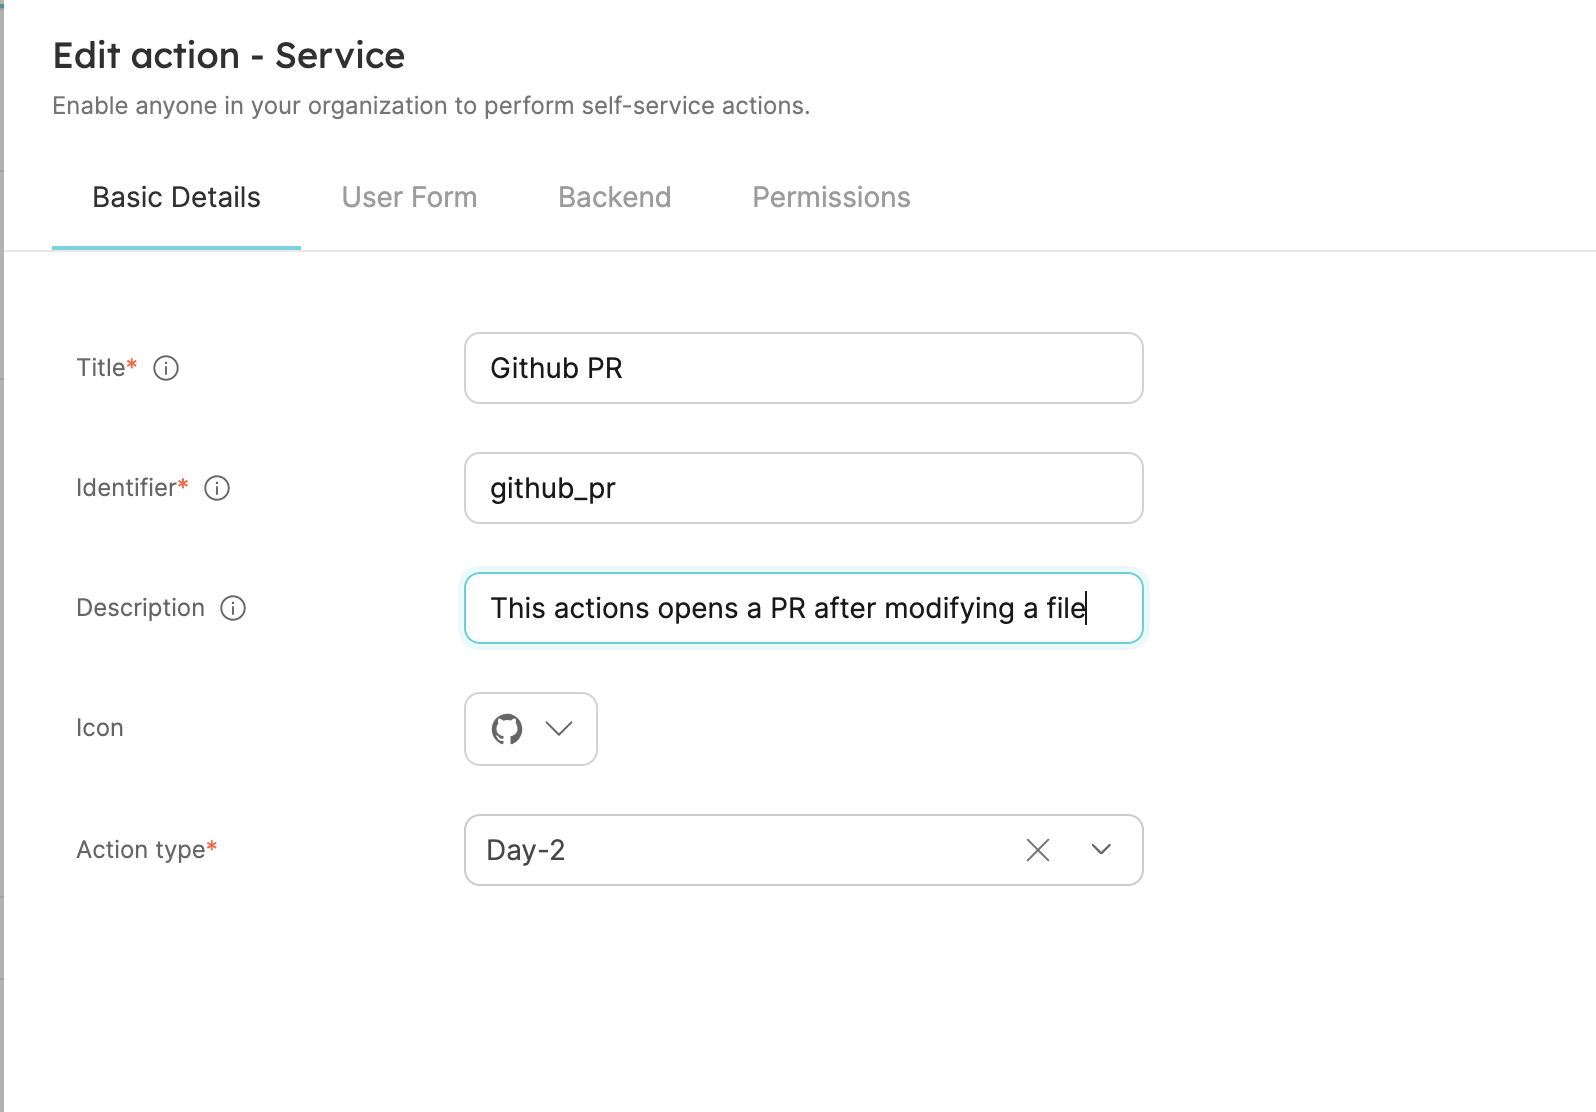
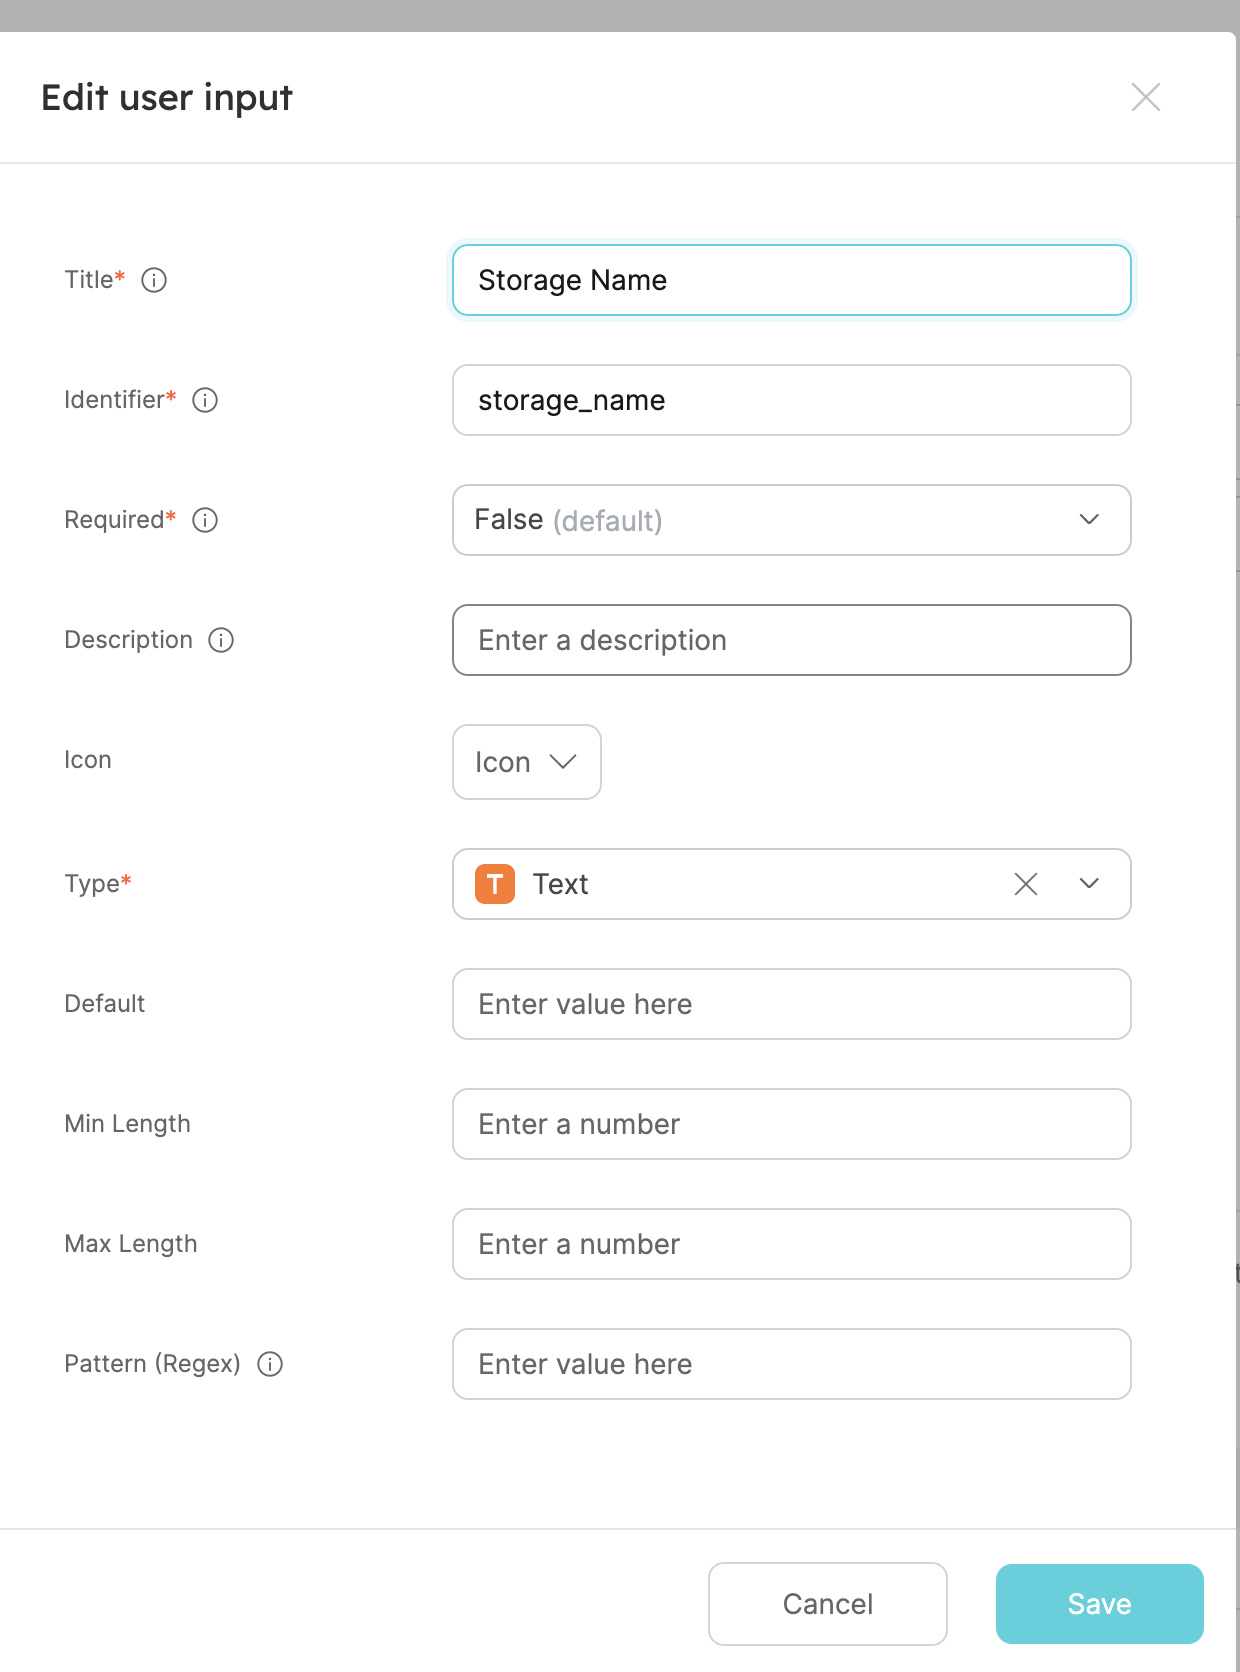
4.我们希望使用此操作的开发人员能指定简单的输入,而不是被 Azure 存储账户的所有可用配置弄得不知所措。对于此操作,我们将定义一个名称和一个位置。
单击 "+ 新输入",像这样填写表格,然后单击 "创建":
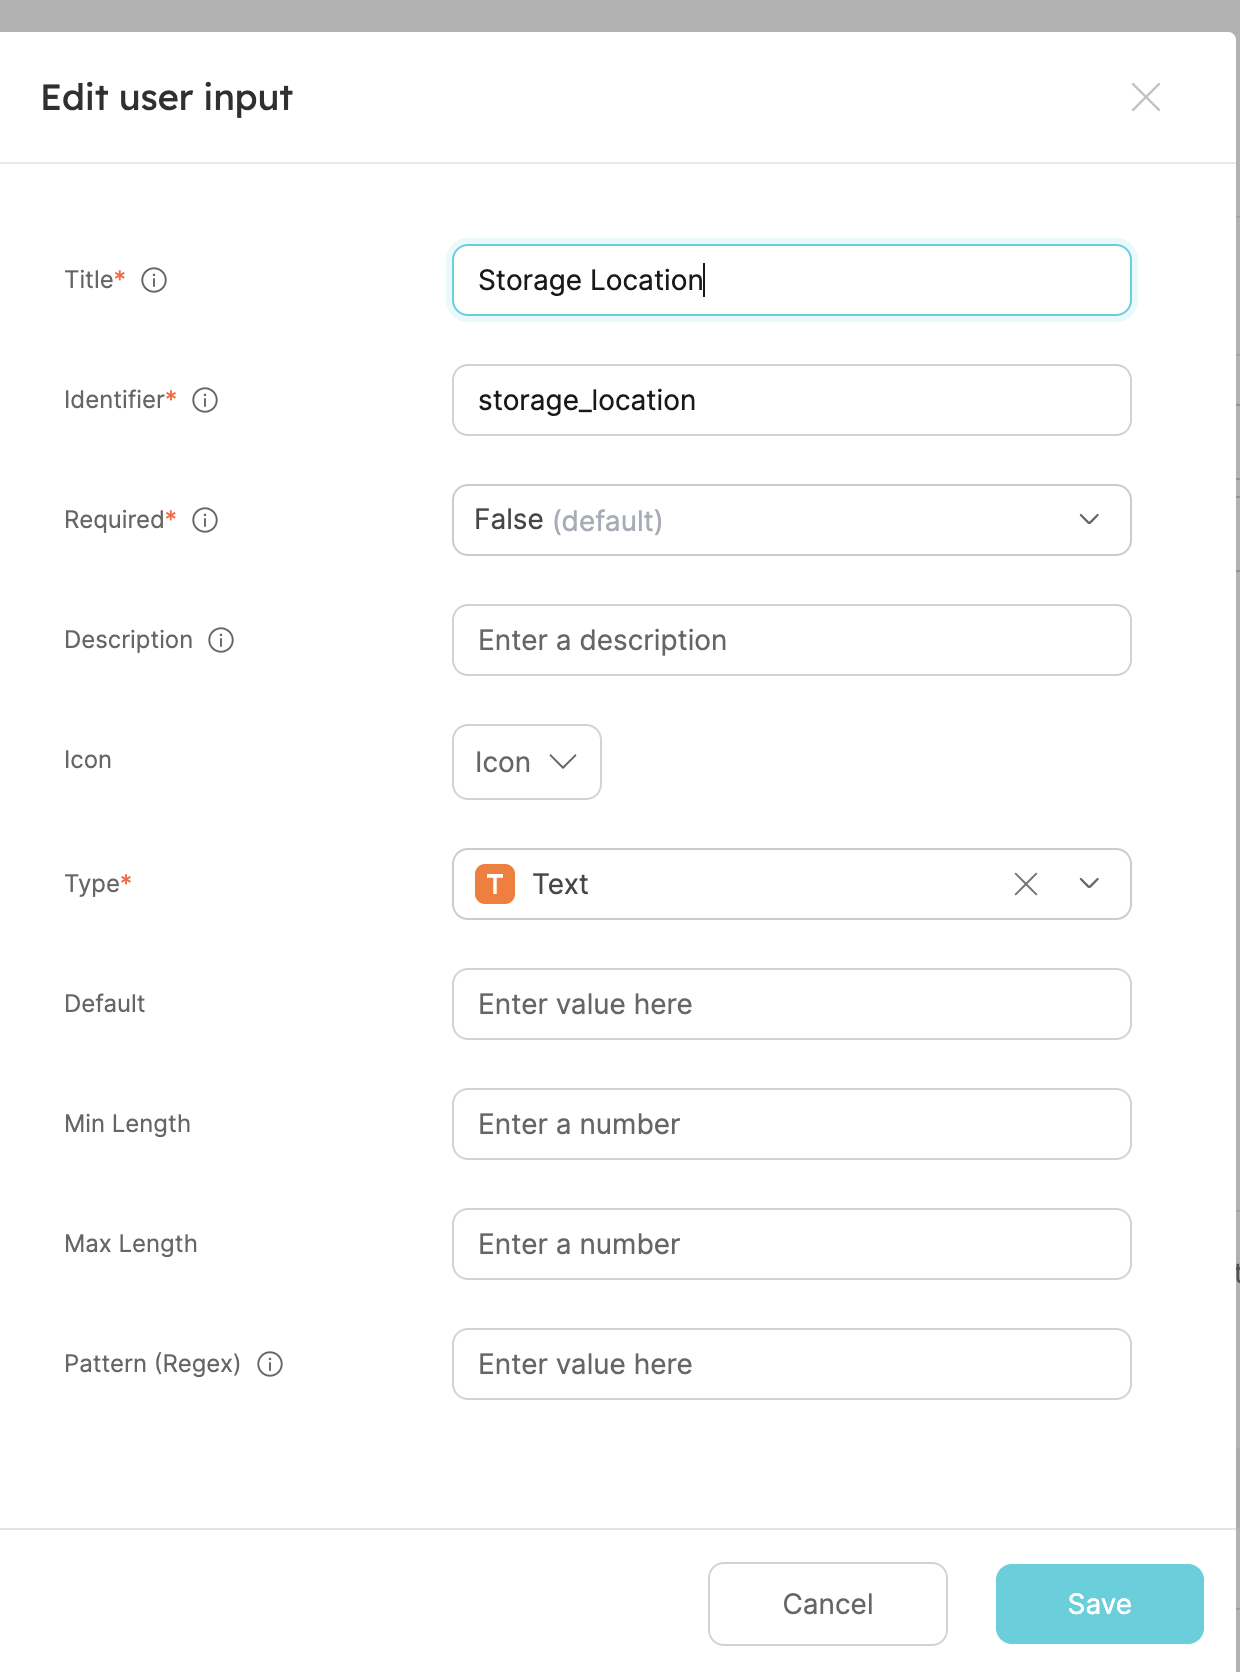
5.现在,让我们创建资源的位置输入。
点击 "+ 新输入",像这样填写表格,然后点击 "创建":
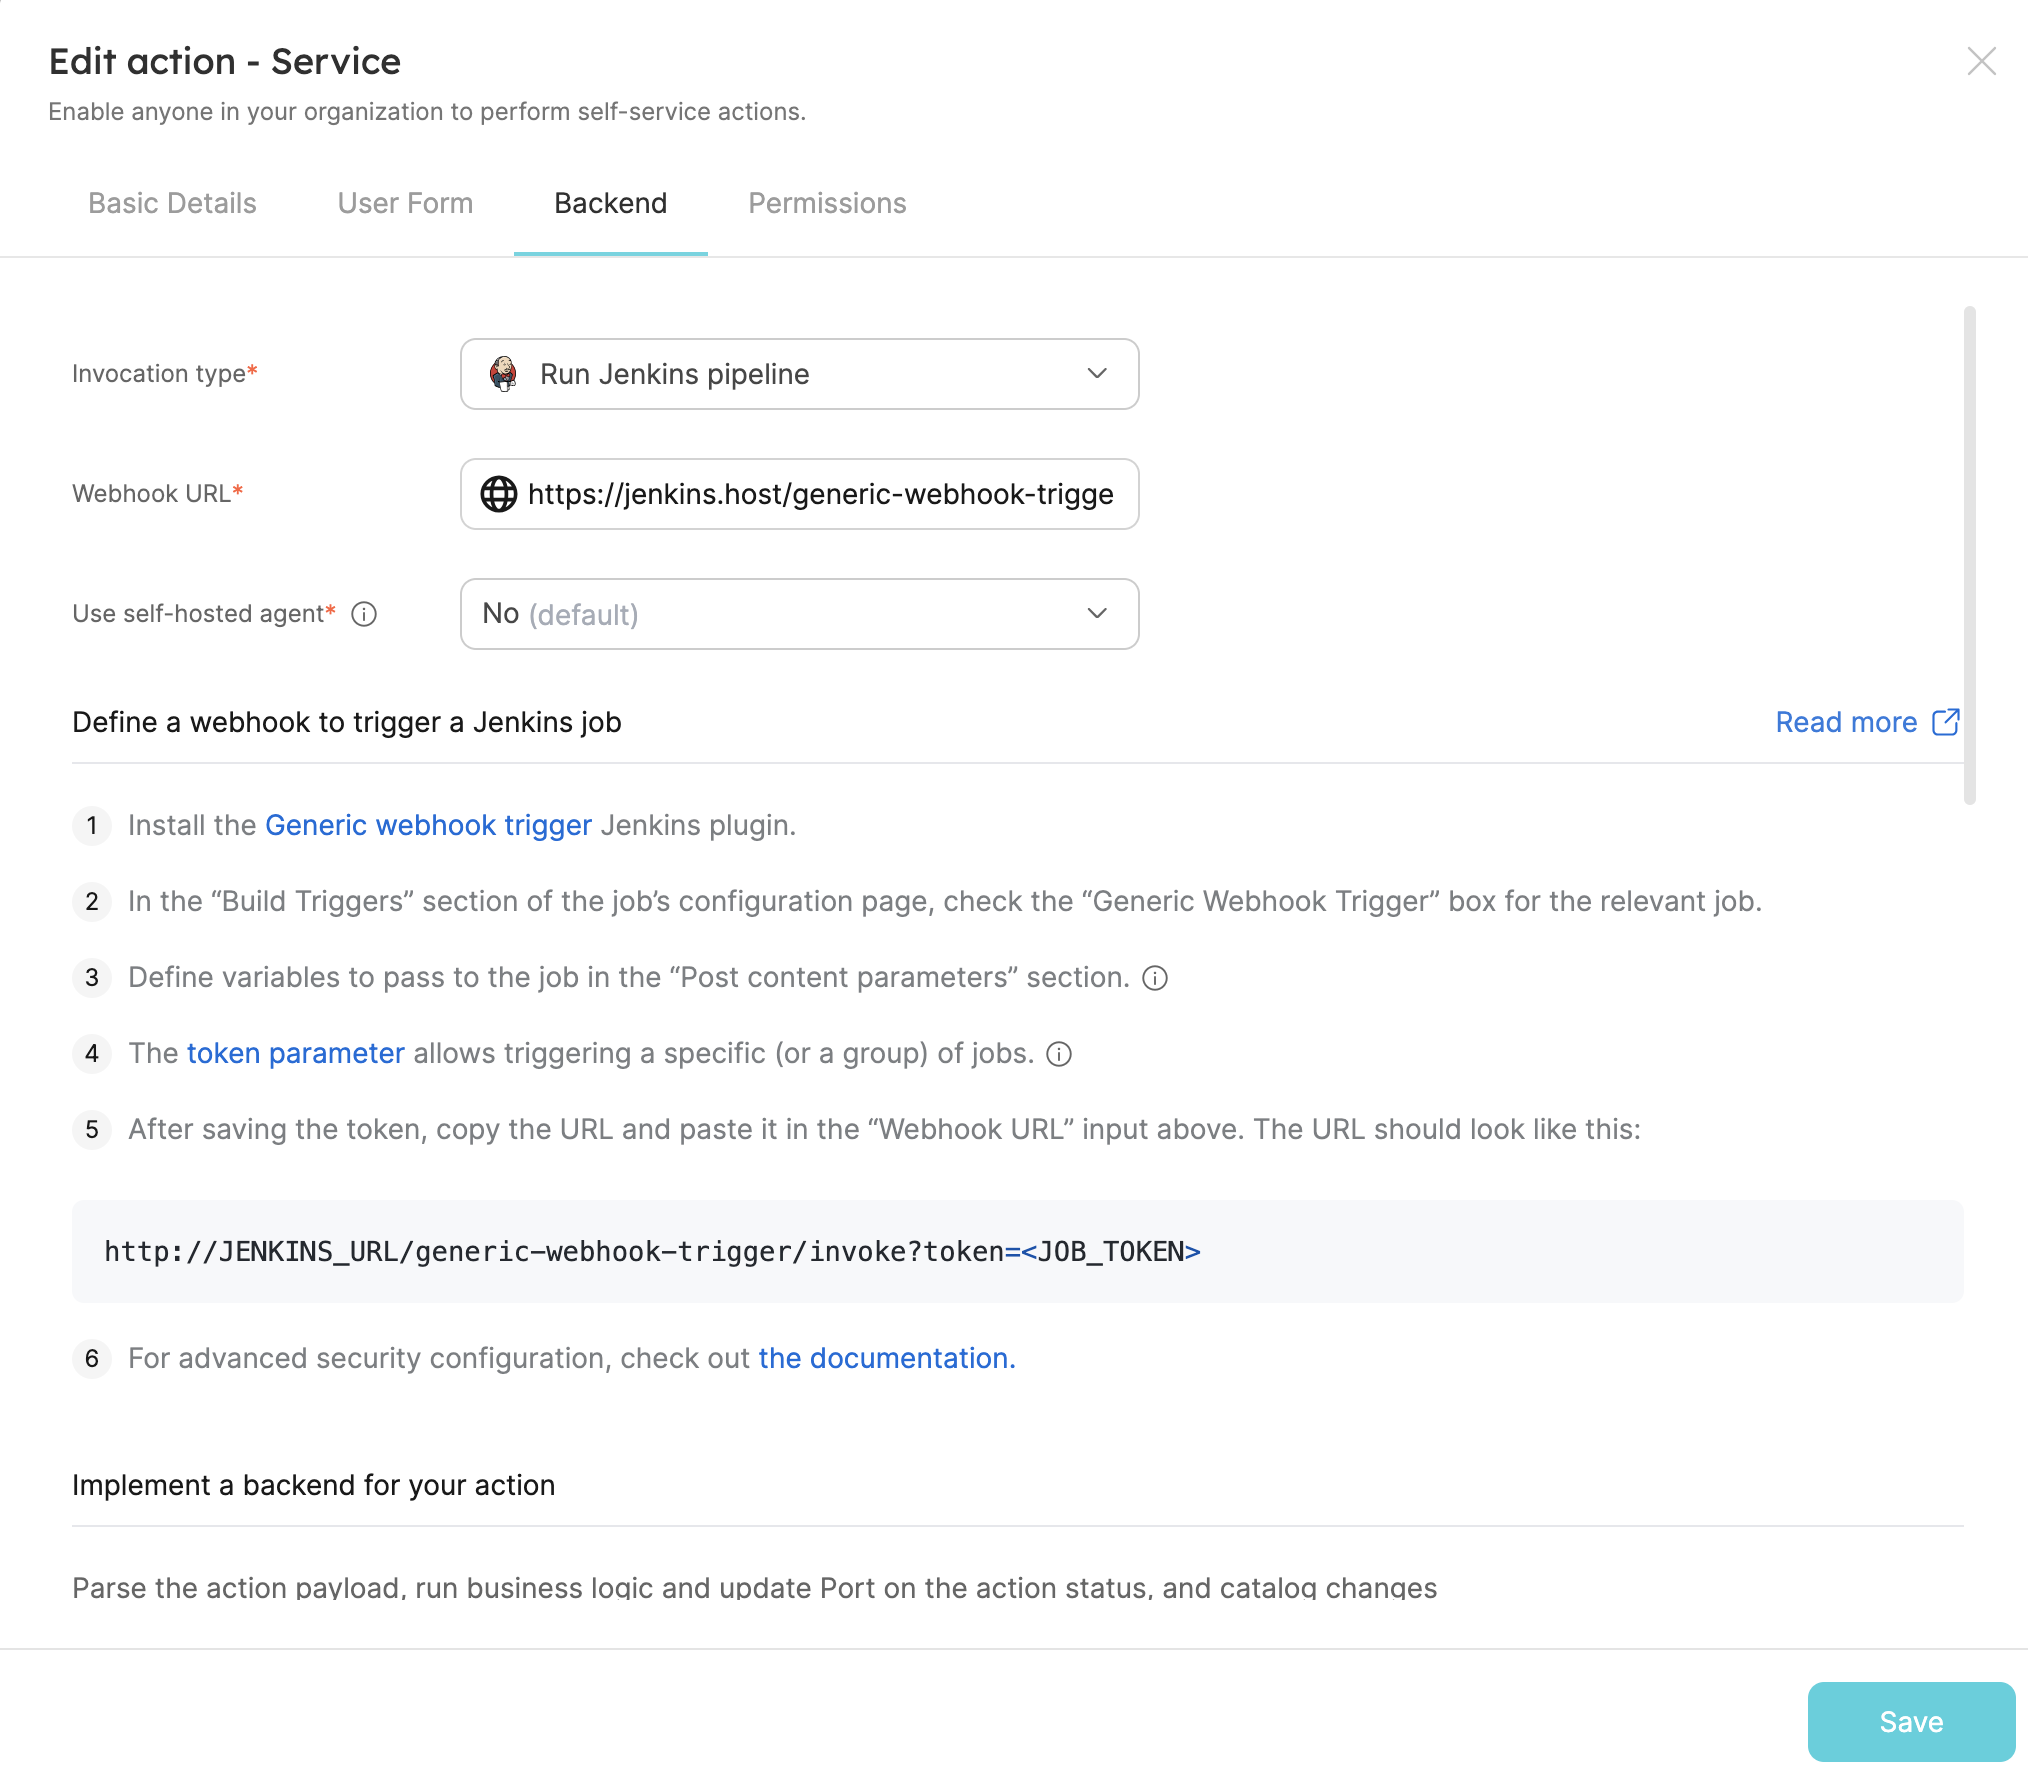
6.现在我们来定义动作的后端。选择 "运行 Jenkins 管道 "调用类型。
- 将
Webhook URL替换为你的 jenkins 作业 URL。 - 确保 URL 的格式为
http://JENKINS_URL/generic-webhook-trigger/invoke?token=<JOB_TOKEN>。 - 点击 `下一步
:::tip 了解更多有关 Jenkins 调用类型的信息here :
7.最后一步是自定义操作权限。为简单��起见,我们将被用于默认设置。更多信息,请参阅permissions 页面。单击 "创建"。
action的前端已准备就绪 🥳
设置action的后端
现在,我们要编写我们的操作将触发的 Jenkins Pipelines。
- 首先,让我们获取必要的 token 和 secrets:
- 登录GitHub tokens page ,创建一个具有
repo和admin:org作用域的个人访问令牌,并将其复制(从我们的 Pipelines 创建拉取请求需要此令牌) 。 -
-To get your Port API credentials go to your Port application, click on the
...button in the top right corner, and selectCredentials. Here you can view and copy yourCLIENT_IDandCLIENT_SECRET:2.将以下内容创建为 Jenkins 凭据: 1.使用 Username with password类型和 idport-credentials创建Port凭据。PORT_CLIENT_ID- Port客户端 ID。PORT_CLIENT_SECRET- Port客户端secret。
WEBHOOK_TOKEN- 网络钩子令牌,只有提供该令牌才能触发任务。GITHUB_TOKEN- 从上一步获得的个人访问令牌。 3.现在,我们将创建一个简单的.tf文件,作为新资源的模板:
- 登录GitHub tokens page ,创建一个具有
- 在 GitHub 仓库的
/templates/(路径应为/templates/create-azure-storage.tf)下创建一个名为create-azure-storage.tf的文件。 - 复制以下代码段并粘贴到文件内容中:
create-azure-storage.tf
resource "azurerm_storage_account" "storage_account" {
  name                = "{{ storage_name }}"
  resource_group_name = "YourResourcesGroup" # replace this with one of your resource groups in your azure cloud acount

  location                 = "{{ storage_location }}"
  account_tier             = "Standard"
  account_replication_type = "LRS"
  account_kind             = "StorageV2"
}
在版本库根目录下添加 main.tf 文件。
main.tf
# Configure the Azure provider
terraform {
  required_providers {
    azurerm = {
      source  = "hashicorp/azurerm"
      version = "~> 3.0.2"
    }
  }

  required_version = ">= 1.1.0"
}

provider "azurerm" {

  features {}
}
4.现在,让我们创建 Pipelines 文件:
1.Enable webhook trigger for a pipeline
2.Define variables for a pipeline 定义 STORAGE_NAME、STORAGE_LOCATION、REPO_URL 和 PORT_RUN_ID 变量。
3.Token Setup 定义令牌,使其与 Port Action 中配置的 JOB_TOKEN 匹配。
我们的 Pipelines 将由 3 个步骤组成,用于选定服务的存储库:
- 使用模板在
main.tf中添加一个资源块,并用动作输入的数据替换其变量。 - 在资源库中创建拉取请求以添加新资源。
- 向 Port 报告并记录操作结果。
在 Jenkins 管道中,请将以下片段作为其内容被用于:
Jenkins pipeline
import groovy.json.JsonSlurper

pipeline {
    agent any

    environment {
        GITHUB_TOKEN = credentials("GITHUB_TOKEN")

        NEW_BRANCH_PREFIX = 'infra/new-resource'
        NEW_BRANCH_NAME = "${NEW_BRANCH_PREFIX}-${STORAGE_NAME}"
        TEMPLATE_FILE = "templates/create-azure-storage.tf"

        PORT_ACCESS_TOKEN = ""
        REPO = ""
    }

    triggers {
        GenericTrigger(
            genericVariables: [
                [key: 'STORAGE_NAME', value: '$.payload.properties.storage_name'],
                [key: 'STORAGE_LOCATION', value: '$.payload.properties.storage_location'],
                [key: 'REPO_URL', value: '$.payload.entity.properties.url'],
                [key: 'PORT_RUN_ID', value: '$.context.runId']
            ],
            causeString: 'Triggered by Port',
            allowSeveralTriggersPerBuild: true,

            regexpFilterExpression: '',
            regexpFilterText: '',
            printContributedVariables: true,
            printPostContent: true
        )
    }

    stages {
        stage('Checkout') {
            steps {
                script {
                    def path = REPO_URL.substring(REPO_URL.indexOf("/") + 1);
                    def pathUrl = path.replace("/github.com/", "");

                    REPO = pathUrl
                }

                git branch: 'main', credentialsId: 'github', url: "[email protected]:${REPO}.git"
            }
        }

        stage('Make Changes') {
            steps {
                script {
                    sh """cat ${TEMPLATE_FILE} | sed "s/{{ storage_name }}/${STORAGE_NAME}/g; s/{{ storage_location }}/${STORAGE_LOCATION}/g" >> main.tf"""

                }
            }
        }
        stage('Create Branch and Commit') {
            steps {
                script {
                    sh "git checkout -b ${NEW_BRANCH_NAME}"
                    sh "git commit -am 'Add a new resource block file'"
                    sh "git push origin ${NEW_BRANCH_NAME}"
                }
            }
        }

        stage('Create pull request') {
            steps {
                script {
                    repo = REPO
                    branch_name = NEW_BRANCH_NAME
                    base_branch = 'main'
                    title = 'New resource block ' + STORAGE_NAME
                    body = 'This pull request adds a new resource block to the project.'

                    createPullRequestCurl(repo, branch_name, base_branch, title, body)
                }
            }
        }
        stage('Get access token') {
            steps {
                withCredentials([usernamePassword(
                    credentialsId: 'port-credentials',
                    usernameVariable: 'PORT_CLIENT_ID',
                    passwordVariable: 'PORT_CLIENT_SECRET')]) {
                    script {
                        // Execute the curl command and capture the output
                        def result = sh(returnStdout: true, script: """
                            accessTokenPayload=\$(curl -X POST \
                                -H "Content-Type: application/json" \
                                -d '{"clientId": "${PORT_CLIENT_ID}", "clientSecret": "${PORT_CLIENT_SECRET}"}' \
                                -s "https://api.getport.io/v1/auth/access_token")
                            echo \$accessTokenPayload
                        """)

                        // Parse the JSON response using JsonSlurper
                        def jsonSlurper = new JsonSlurper()
                        def payloadJson = jsonSlurper.parseText(result.trim())

                        // Access the desired data from the payload
                        PORT_ACCESS_TOKEN = payloadJson.accessToken
                    }
                }
            }
        }
        stage('Notify Port') {
            steps {
                script {
                    def logs_report_response = sh(script: """
                        curl -X POST \
                            -H "Content-Type: application/json" \
                            -H "Authorization: Bearer ${PORT_ACCESS_TOKEN}" \
                            -d '{"message": "Created GitHub PR for new terraform resource ${STORAGE_NAME}"}"}' \
                            "https://api.getport.io/v1/actions/runs/$PORT_RUN_ID/logs"
                    """, returnStdout: true)

                    println(logs_report_response)
                }
            }
        }
        stage('Update Run Status') {
            steps {
                script {
                    def status_report_response = sh(script: """
                        curl -X PATCH \
                          -H "Content-Type: application/json" \
                          -H "Authorization: Bearer ${PORT_ACCESS_TOKEN}" \
                          -d '{"status":"SUCCESS", "message": {"run_status": "Jenkins CI/CD Run completed successfully!"}}' \
                             "https://api.getport.io/v1/actions/runs/${PORT_RUN_ID}"
                    """, returnStdout: true)

                    println(status_report_response)
                }
            }
        }
    }

    post {

        failure {
            // Update Port Run failed.
            script {
                def status_report_response = sh(script: """
                    curl -X PATCH \
                        -H "Content-Type: application/json" \
                        -H "Authorization: Bearer ${PORT_ACCESS_TOKEN}" \
                        -d '{"status":"FAILURE", "message": {"run_status": "Failed to create azure resource ${STORAGE_NAME}"}}' \
                            "https://api.getport.io/v1/actions/runs/${PORT_RUN_ID}"
                """, returnStdout: true)

                println(status_report_response)
            }
        }

        // Clean after build
        always {
            cleanWs(cleanWhenNotBuilt: false,
                    deleteDirs: true,
                    disableDeferredWipeout: false,
                    notFailBuild: true,
                    patterns: [[pattern: '.gitignore', type: 'INCLUDE'],
                               [pattern: '.propsfile', type: 'EXCLUDE']])
        }
    }
}

def createPullRequestCurl(repo, headBranch, baseBranch, title, body) {
    curlCommand = "curl -X POST https://api.github.com/repos/$repo/pulls -H 'Authorization: Bearer ${GITHUB_TOKEN}' -d '{ \"head\": \"$headBranch\", \"base\": \"$baseBranch\", \"title\": \"$title\", \"body\": \"$body\", \"draft\": false }'"

    try {
        response = sh(script: curlCommand)

        if (response.contains('201 Created')) {
            println "Pull request created successfully"
        } else {
            println "Failed to create pull request"
            println response
        }
    } catch (Exception e) {
        println "Error occurred during CURL request: ${e.getMessage()}"
    }
}
完成!操作已准备就绪 🚀
执行操作
创建操作后,该操作将出现在 Port 应用程序的 "自助服务 "选项卡下:
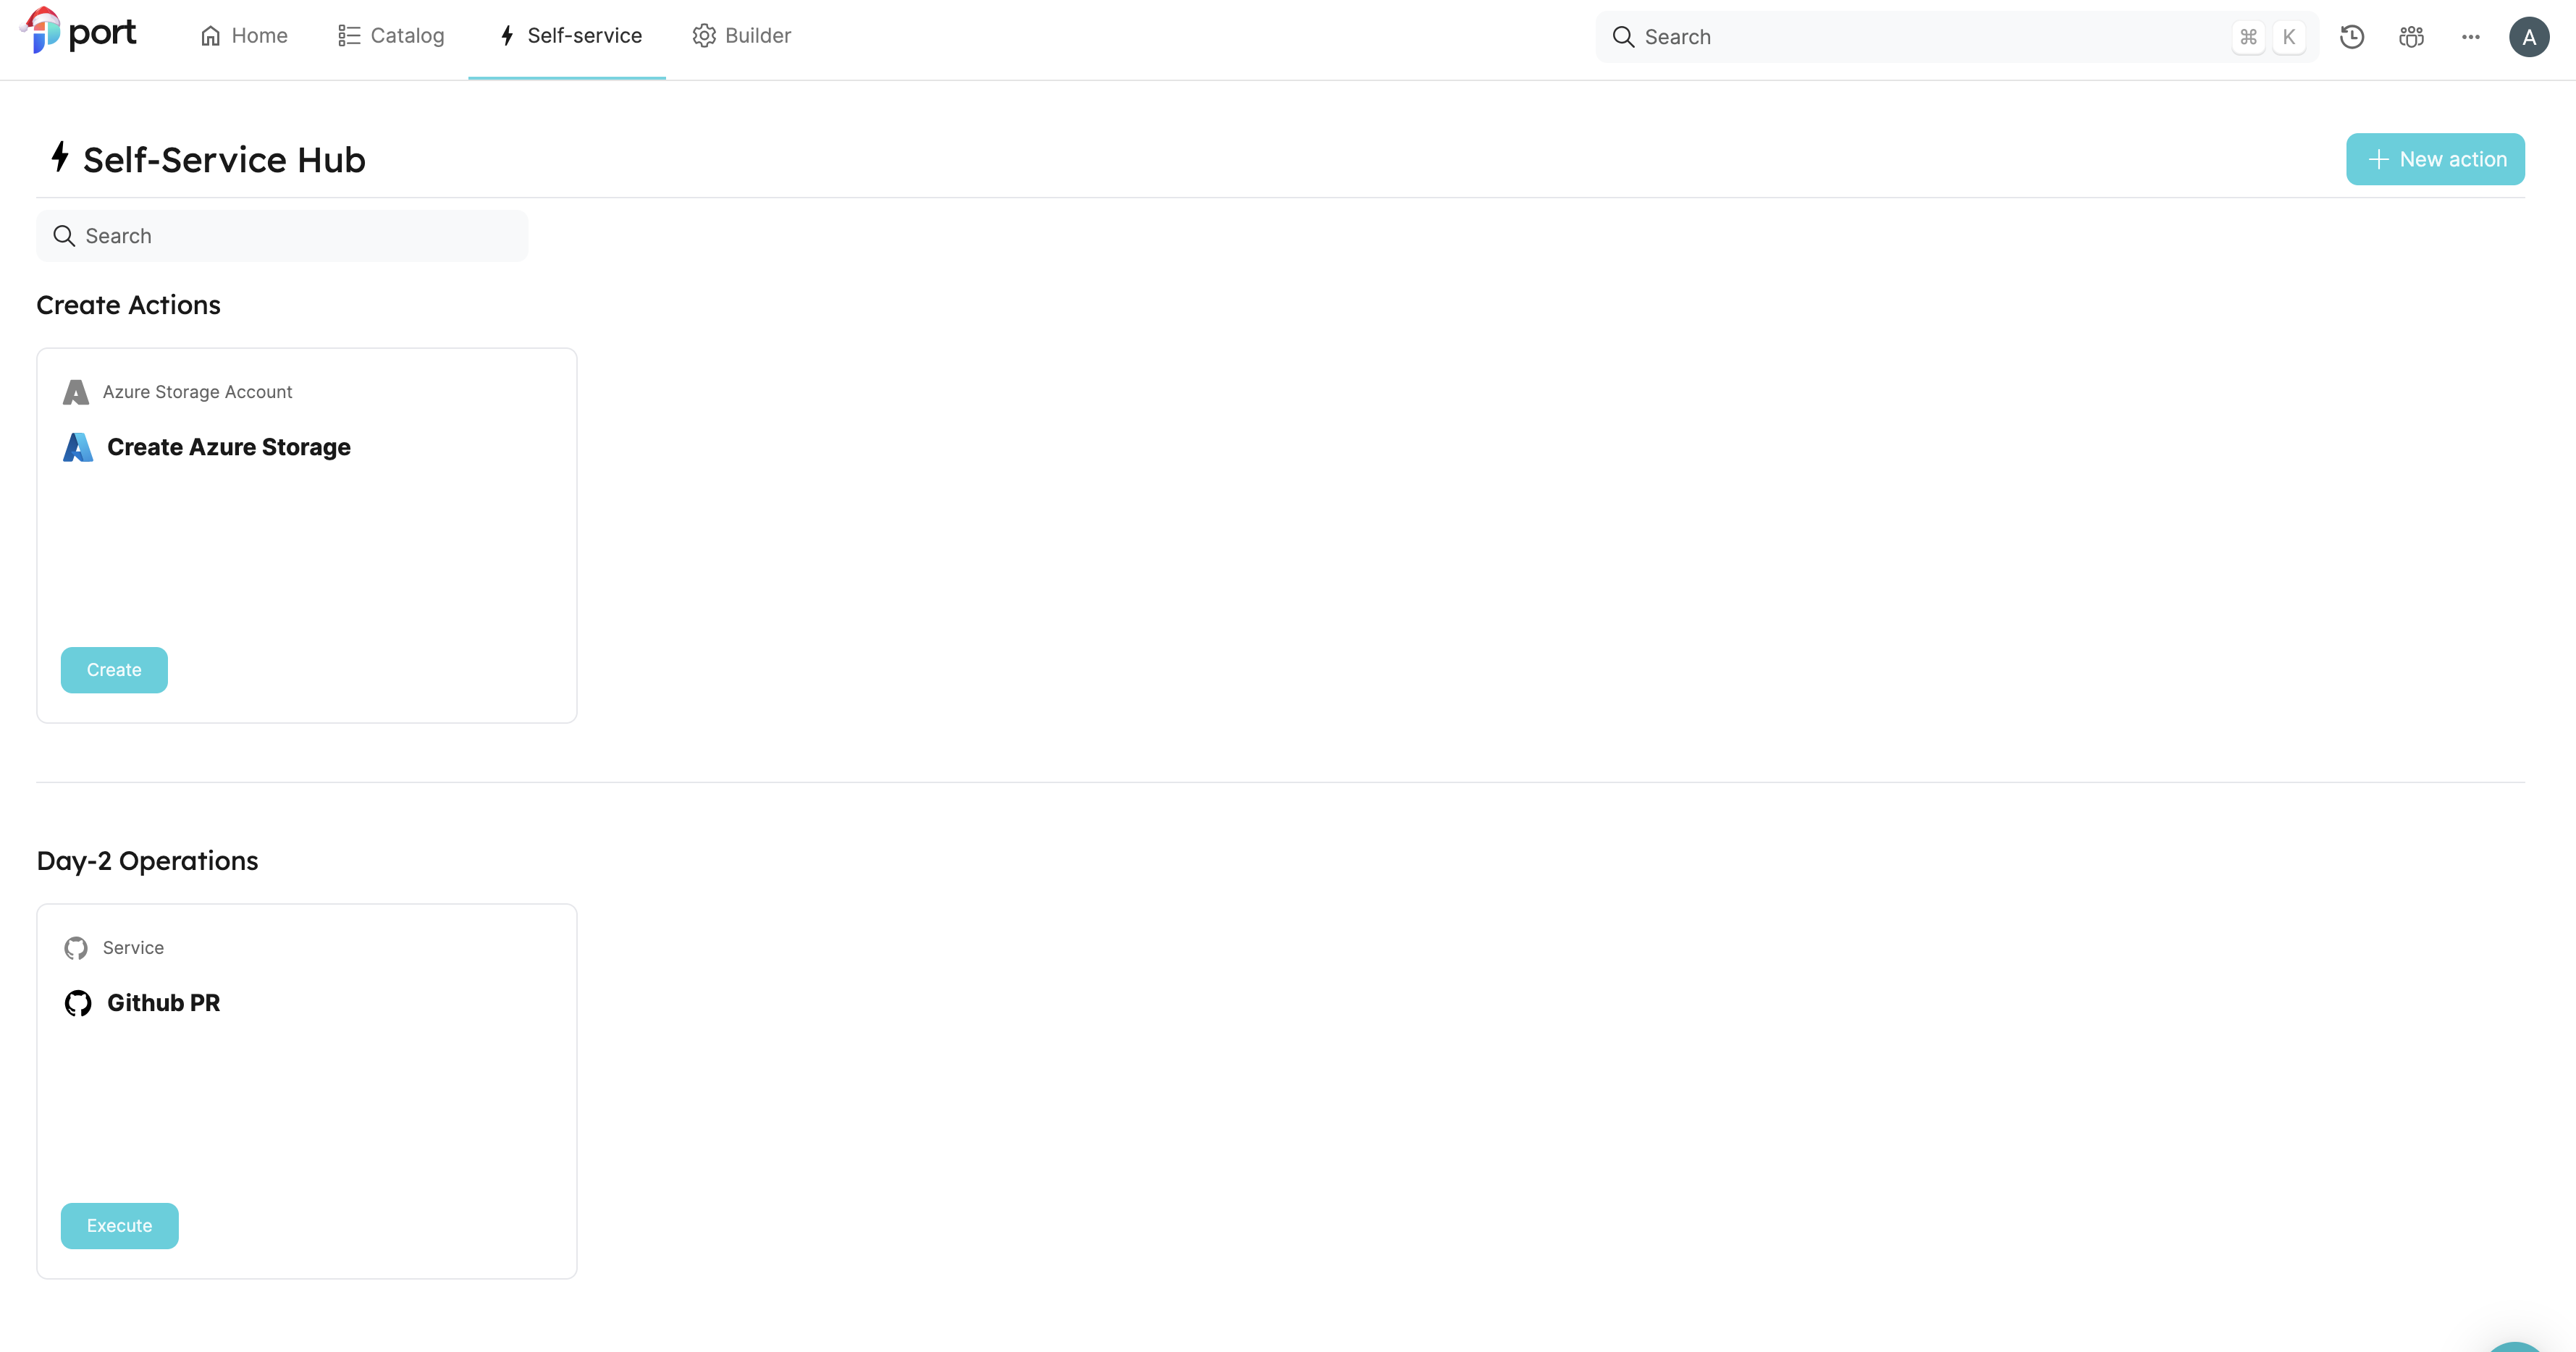
- 点击 "执行"。
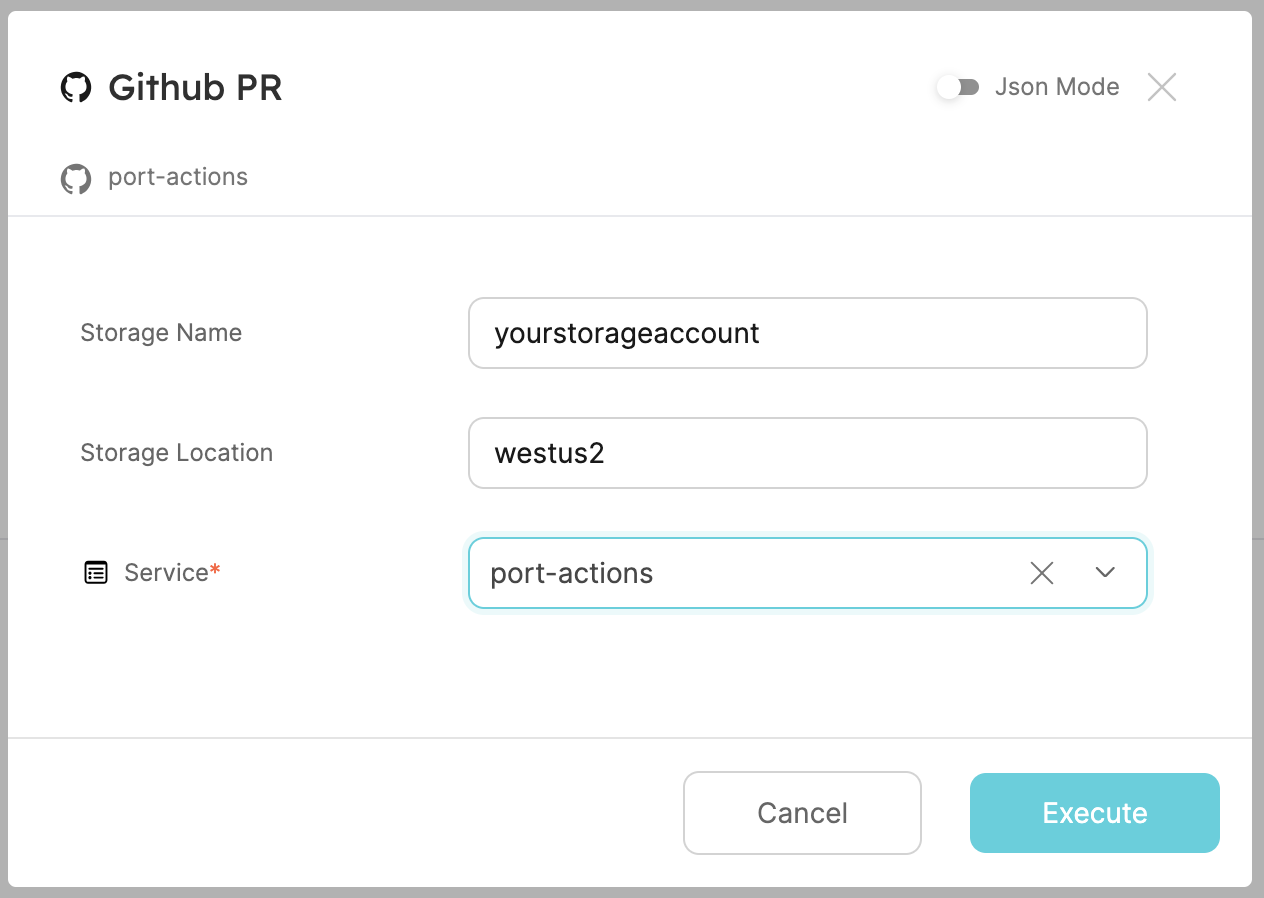
- 输入 Azure 存储账户的名称和位置,从列表中选择任何服务,然后单击 "执行"。此时会弹出一个小窗口,点击 "查看详情":

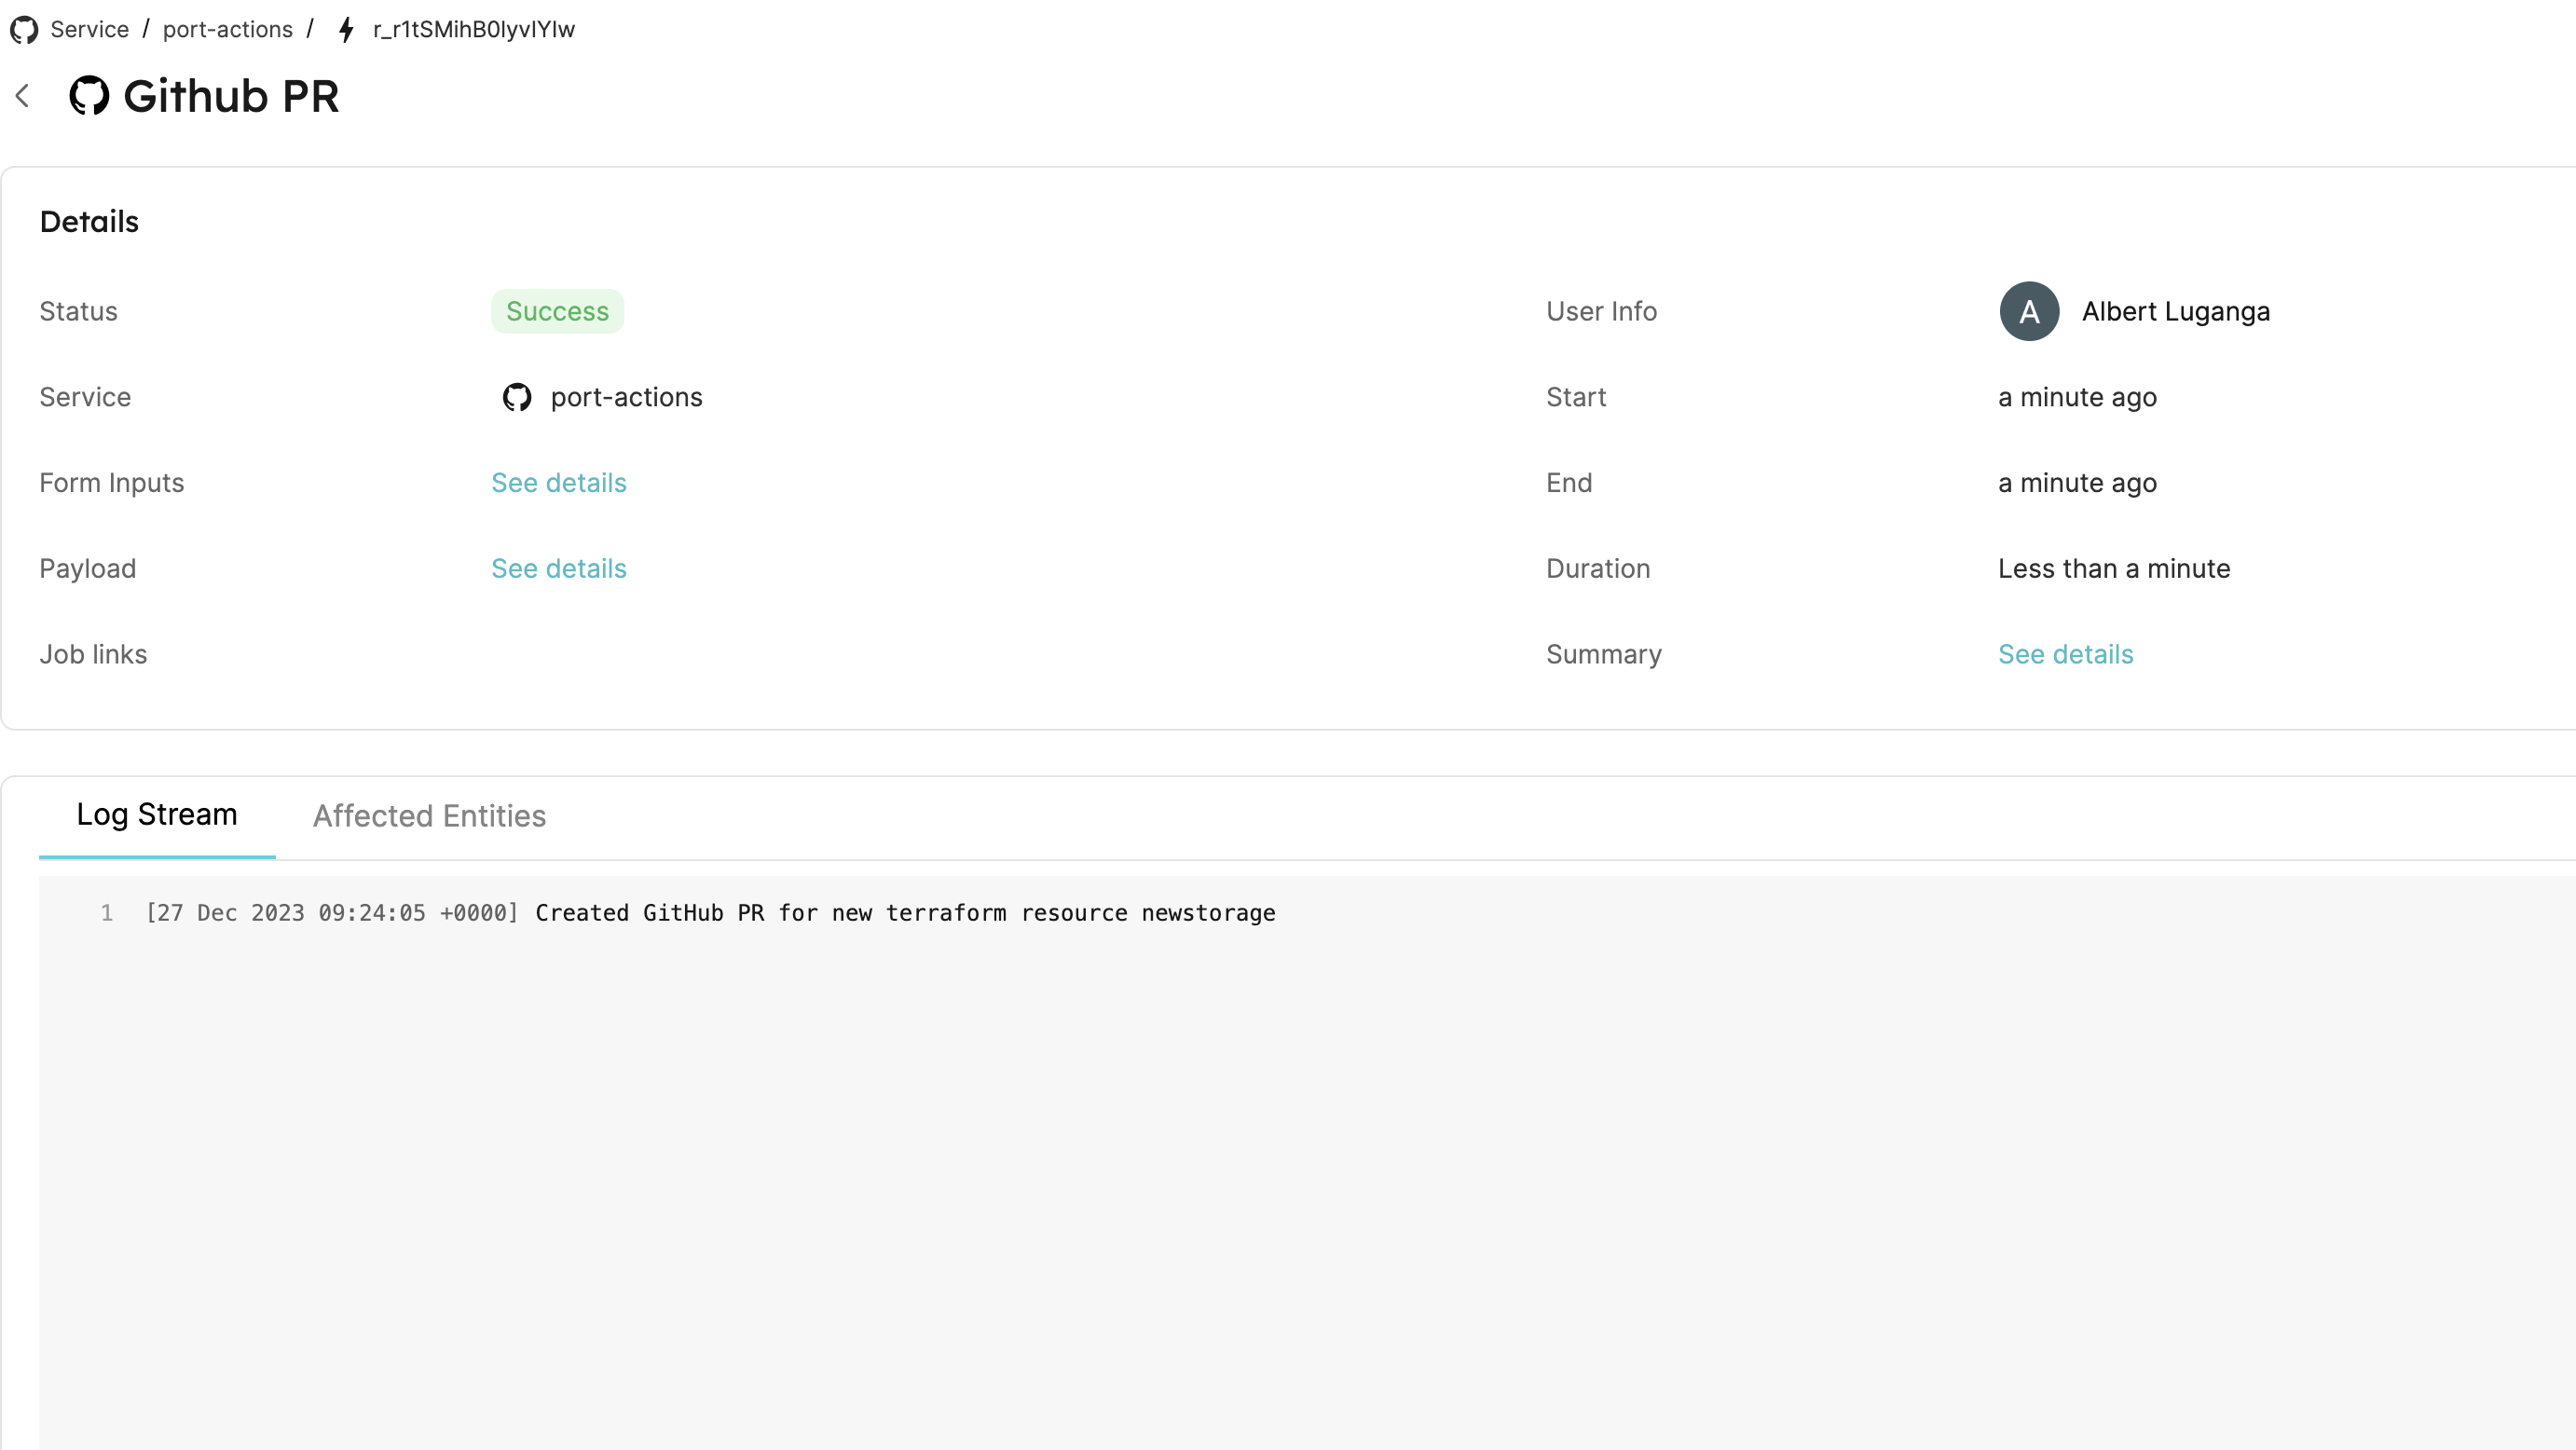
3.该页面提供了有关操作运行的详细信息。我们可以看到,后端返回了 "成功",拉取请求已成功创建:
All done! You can now create PRs for your services directly from Port 💪🏽
更多相关指南和示例: