在本地调试 Webhook
在本指南中,我们将向您介绍如何调试从 Port 本地发送的 Webhook 自助服务操作。
本例包含设置标准自助服务操作用例的初始步骤,下面将展示如何本地调试 Port 通过 webhook 发送的有效负载invocation method 。
先决条件
- Port API
CLIENT_ID和CLIENT_SECRET; - 已安装 Python 和 PIP
- 节点
在本例中,与 Port 的交互主要通过应用程序接口进行,但也可以通过网络用户界面完成。
场景
您想使用 Port 的 "CREATE "自助操作配置新虚拟机。
在这个例子中,您将
- 创建新的 "VM "蓝图
- 在蓝图中添加一个
CREATE操作 - 使用本地 Web 服务器调试每次开发人员请求新虚拟机时 Port 发送的 webhook 请求。
创建虚拟机蓝图
让我们配置一个 VM 蓝图,它的基本结构是
{
  "identifier": "vm",
  "title": "VM",
  "icon": "Server",
  "schema": {
    "properties": {
      "region": {
        "title": "Region",
        "type": "string",
        "description": "Region of the VM"
      },
      "cpu_cores": {
        "title": "CPU Cores",
        "type": "number",
        "description": "Number of allocated CPU cores"
      },
      "memory_size": {
        "title": "Memory Size ",
        "type": "number",
        "description": "Amount of allocated memory (GB)"
      },
      "storage_size": {
        "title": "Storage Size",
        "type": "number",
        "description": "Amount of allocated storage (GB)"
      },
      "free_storage": {
        "title": "Free Storage",
        "type": "number",
        "description": "Amount of free storage (GB)"
      },
      "deployed": {
        "title": "Deploy Status",
        "type": "string",
        "description": "The deployment status of this VM"
      }
    },
    "required": []
  },
  "calculationProperties": {}
}
下面是创建该蓝图的 "python "代码(切记插入 "CLIENT_ID "和 "CLIENT_SECRET "以获取访问令牌)
Click here to see the code
import requests

CLIENT_ID = 'YOUR_CLIENT_ID'
CLIENT_SECRET = 'YOUR_CLIENT_SECRET'

API_URL = 'https://api.getport.io/v1'

credentials = {'clientId': CLIENT_ID, 'clientSecret': CLIENT_SECRET}

token_response = requests.post(f'{API_URL}/auth/access_token', json=credentials)

access_token = token_response.json()['accessToken']

headers = {
    'Authorization': f'Bearer {access_token}'
}

blueprint = {
    "identifier": "vm",
    "title": "VM",
    "icon": "Server",
    "schema": {
        "properties": {
            "region": {
                "title": "Region",
                "type": "string",
                "description": "Region of the VM"
            },
            "cpu_cores": {
                "title": "CPU Cores",
                "type": "number",
                "description": "Number of allocated CPU cores"
            },
            "memory_size": {
                "title": "Memory Size ",
                "type": "number",
                "description": "Amount of allocated memory (GB)"
            },
            "storage_size": {
                "title": "Storage Size",
                "type": "number",
                "description": "Amount of allocated storage (GB)"
            },
            "free_storage": {
                "title": "Free Storage",
                "type": "number",
                "description": "Amount of free storage"
            },
            "deployed": {
                "title": "Deploy Status",
                "type": "string",
                "description": "The deployment status of this VM"
            }
        },
        "required": []
    },
    "calculationProperties": {},

}

response = requests.post(f'{API_URL}/blueprints', json=blueprint, headers=headers)

print(response.json())
创建虚拟机 CREATE 操作
为了在本地调试操作有效载荷,您需要将其转发到本地计算机,这意味着 webhook 目标需要是您的 "localhost"。为了将指向 webhook 的请求转发到 localhost,我们将使用smee.io 。
您只需点击 "启动新频道",然后复制所提供的 "Webhook 代理 URL",它应该类似于下面的内容: https://smee.io/b1iO4C4ZGNYmiVL5 。
现在,让我们配置一个自助服务操作(Self-Service Action)。 您将添加一个 "CREATE "操作,开发人员每次创建新的虚拟机实体时都会触发该操作,自助服务操作将触发在本地计算机上运行的小型网络服务器。
以下是操作 JSON:
{
  "identifier": "create_vm",
  "title": "Create VM",
  "icon": "Server",
  "description": "Create a new VM in cloud provider infrastructure",
  "trigger": "CREATE",
  "invocationMethod": { "type": "WEBHOOK", "url": "YOUR SMEE URL" },
  "userInputs": {
    "properties": {
      "title": {
        "type": "string",
        "title": "Title of the new VM"
      },
      "cpu": {
        "type": "number",
        "title": "Number of CPU cores"
      },
      "memory": {
        "type": "number",
        "title": "Size of memory"
      },
      "storage": {
        "type": "number",
        "title": "Size of storage"
      },
      "region": {
        "type": "string",
        "title": "Deployment region",
        "enum": ["eu-west-1", "eu-west-2", "us-west-1", "us-east-1"]
      }
    },
    "required": ["cpu", "memory", "storage", "region"]
  }
}
下面是创建此操作的 "python "代码。
- 请记住插入您的
CLIENT_ID和CLIENT_SECRET,以获取访问令牌。 - 记得插入从
smee获取的代理 URL,以便将 webhook 消息重定向到本地主机。
vm 蓝图标识符是如何被用于以将操作添加到新蓝图的Click here to see code
import requests

CLIENT_ID = 'YOUR_CLIENT_ID'
CLIENT_SECRET = 'YOUR_CLIENT_SECRET'

API_URL = 'https://api.getport.io/v1'

credentials = {'clientId': CLIENT_ID, 'clientSecret': CLIENT_SECRET}

token_response = requests.post(f'{API_URL}/auth/access_token', json=credentials)

access_token = token_response.json()['accessToken']

headers = {
    'Authorization': f'Bearer {access_token}'
}

blueprint_identifier = 'vm'

action = {
    'identifier': 'create_vm',
    'title': 'Create VM',
    'icon': 'Server',
    'description': 'Create a new VM in cloud provider infrastructure',
    'trigger': 'CREATE',
    "invocationMethod": { 'type': 'WEBHOOK', 'url': 'YOUR SMEE URL' },
    'userInputs': {
        'properties': {
            'title': {
                'type': 'string',
                'title': 'Title of the new VM'
            },
            'cpu': {
                'type': 'number',
                'title': 'Number of CPU cores'
            },
            'memory': {
                'type': 'number',
                'title': 'Size of memory'
            },
            'storage': {
                'type': 'number',
                'title': 'Size of storage'
            },
            'region': {
                'type': 'string',
                'title': 'Deployment region',
                'enum': ['eu-west-1', 'eu-west-2', 'us-west-1', 'us-east-1']
            }
        },
        'required': [
            'cpu', 'memory', 'storage', 'region'
        ]
    }
}

response = requests.post(f'{API_URL}/blueprints/{blueprint_identifier}/actions', json=action, headers=headers)

print(response.json())
将事件转发到本地主机
现在安装 Smee 客户端,将事件转发到您的 localhost,您将被用于 pysmee 来实现这一点:
pip install pysmee
现在用它来转发事件,举个例子:
pysmee forward https://smee.io/b1iO4C4ZGNYmiVL5 http://localhost:3000/webhooks
你应该会看到类似这样的日志行输出:
[2022-09-15 13:59:39,462 MainThread] INFO: Forwarding https://smee.io/b1iO4C4ZGNYmiVL5 to http://localhost:3000/webhooks
在 Nodejs 中创建一个小型示例服务器
现在,由于您要将事件转发到本地主机,您只需创建一个小型服务器,用于监听发送到 /webhooks 路由的 POST 请求。
创建文件夹并在其中运行以下程序
npm init -y
npm install express
在该文件夹中创建一个 index.js 文件并粘贴以下内容:
const { createHmac } = require("crypto");
const express = require("express");
const app = express();
const port = 3000;

app.post("/webhooks", (request, response) => {
  // This part is used to verify that the webhook message was sent by Port
  const signed = createHmac("sha256", "<CLIENT_SECRET>")
    .update(
      `${request.headers["x-port-timestamp"]}.${JSON.stringify(request.body)}`
    )
    .digest("base64");

  if (signed !== request.headers["x-port-signature"].split(",")[1]) {
    throw new Error("Invalid singature");
  }

  // You can put any custom logic here
  console.log("Success!");

  response.send("Hello World!");
});

app.listen(port, () => {
  console.log(`Example app listening on port ${port}`);
});
现在运行服务器:
node index.js
触发action
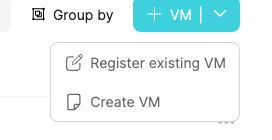
登录 Port 并转到虚拟机页面,通过创建虚拟机操作按钮触发操作:

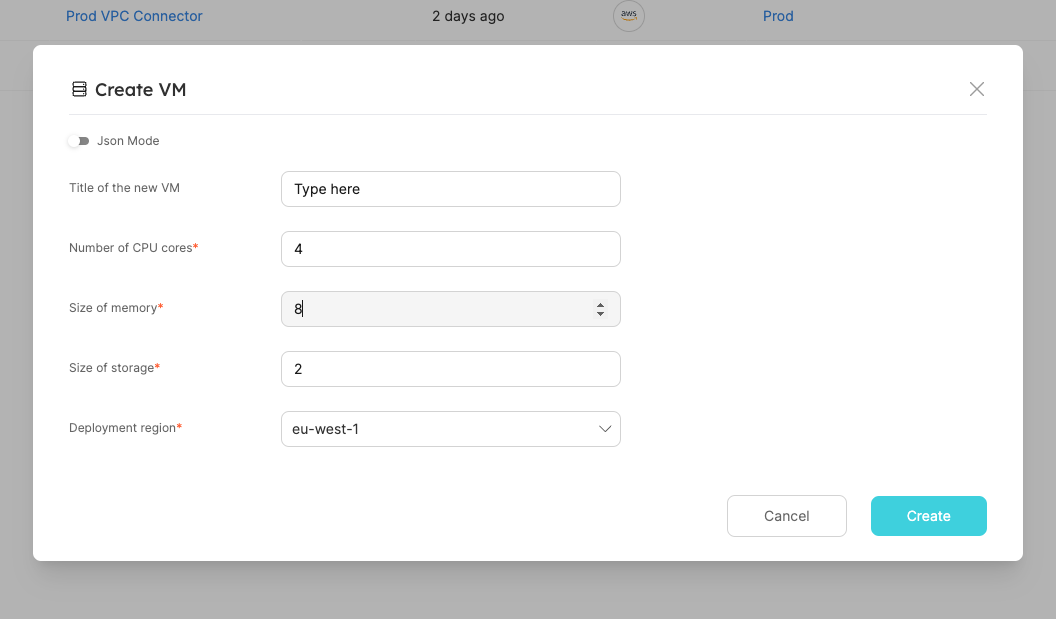
填写所需详细信息并点击 "创建

就这样,"成功!"的 Output 显示本地服务器确实收到了 webhook 有效负载: