如何配置 AzureAD
请按照本分步指南配置 Port 和 Azure Active Directory 之间的集成。
为了完成该流程,您需要联系我们以获得您需要的信息,以及 Port 需要您提供的信息。 所有内容将在下文中详细说明。
Port-AzureAd 集成�优势
- 通过 AzureAD 应用程序连接到 Port 应用程序。
- 用户登录后,AzureAD 团队将自动与 Port 同步。
- 根据 AzureAD 组设置 Port 上的细粒度权限。
如何在 Azure AD 中配置 Port 应用程序
info
前提条件
要使 Port 应用程序连接正常工作,拥有访问权限的用户需要在 Azure AD 中的 "Email "字段中拥有合法值。
###步骤 #1: 注册新的应用程序
- 在 Microsoft Azure 门户中,转到 "Azure Active Directory"。
- 单击 "应用程序注册"。
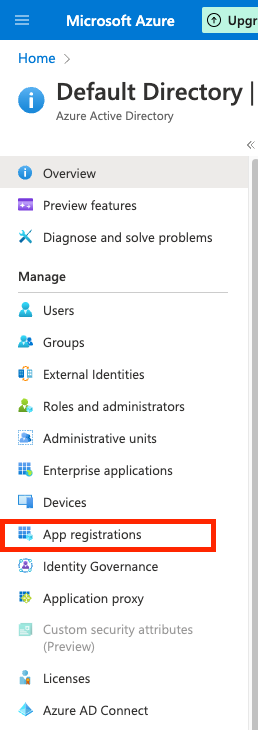 3.单击页面顶部的 "新注册
 4.定义 Port 应用程序设置:
4.1
 名称: 为 Port 应用程序插入一个友好的名称,如Port.4.2支持的帐户类型: 请选择适合贵机构的选项。 对于大多数用例,这将是 仅本组织目录中的账户(仅默认目录 - 单租户)。 ::4.3重定向 URI:-将平台设为Web。- 将
URL设置为https://auth.getport.io/login/callback。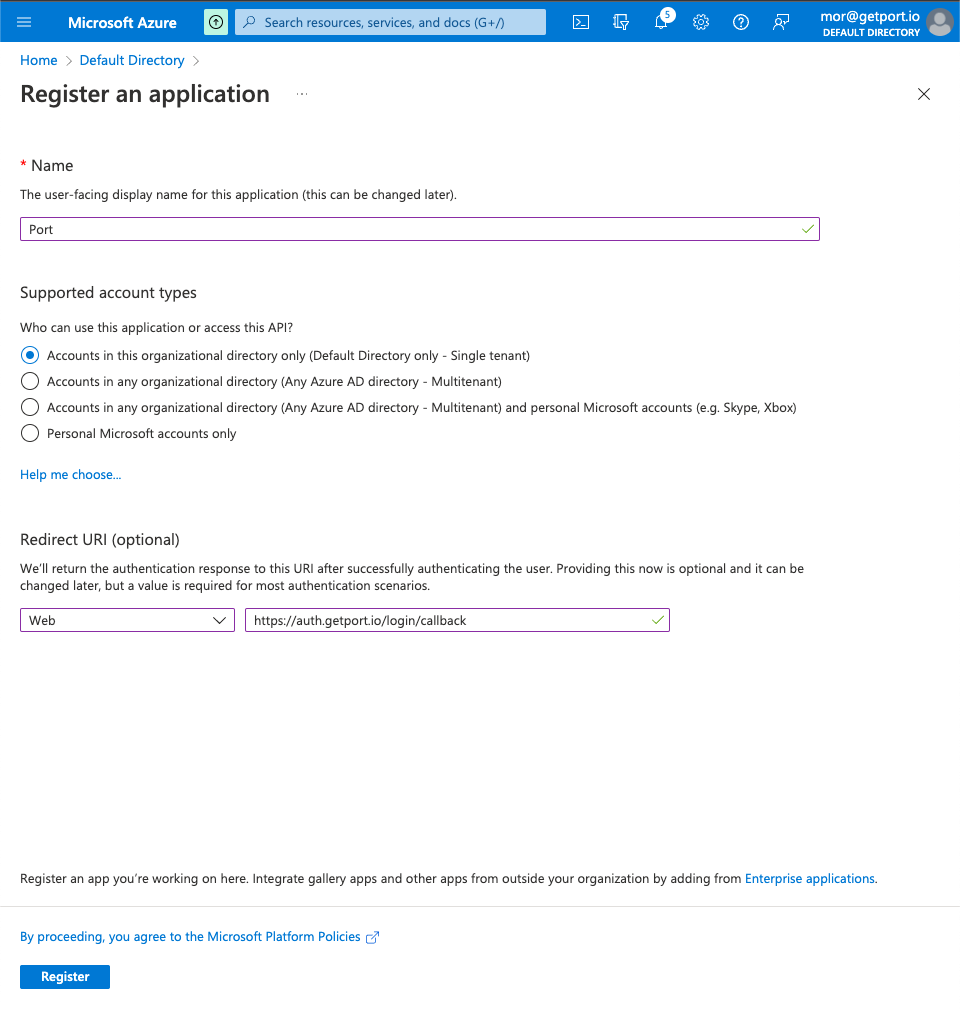 4.4 单击
 Register。
- 将
第二步: 使用登录 URL 和徽标定制 Port 应用程序
-
在新的 Port App 页面,点击
品牌和属性 1.1主页 URL`: 粘贴以下 URL:https://auth.getport.io/authorize?response_type=token&client_id=96IeqL36Q0UIBxIfV1oqOkDWU6UslfDj&connection={CONNECTION_NAME}&redirect_uri=https%3A%2F%2Fapp.getport.io
:::note
We will provide your `{CONNECTION_NAME}` (Contact us on Slack/Intercom).
:::
1.2 Add the Port logo (optional):

1.3 `Publisher domain`: Select the domain matching **your** user emails (for example `getport.io`).

1.4 Click `Save`.
步骤 #3: 配置应用程序权限
- 在 Port App 页面,单击 "API 权限"。
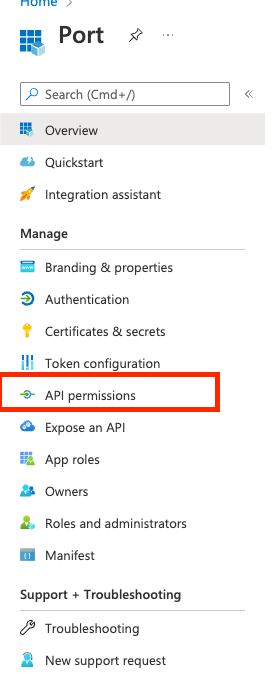 2.单击
2.单击 添加权限: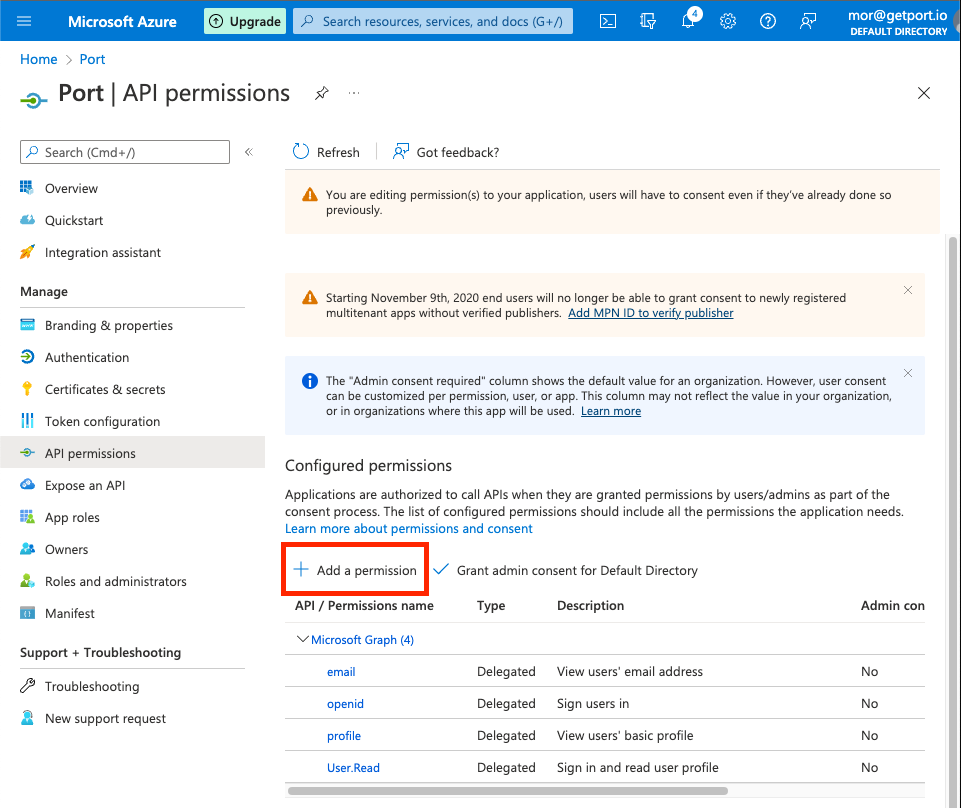 3.在
3.在 Microsoft APIs选项卡上: 3.1 单击Microsoft Graph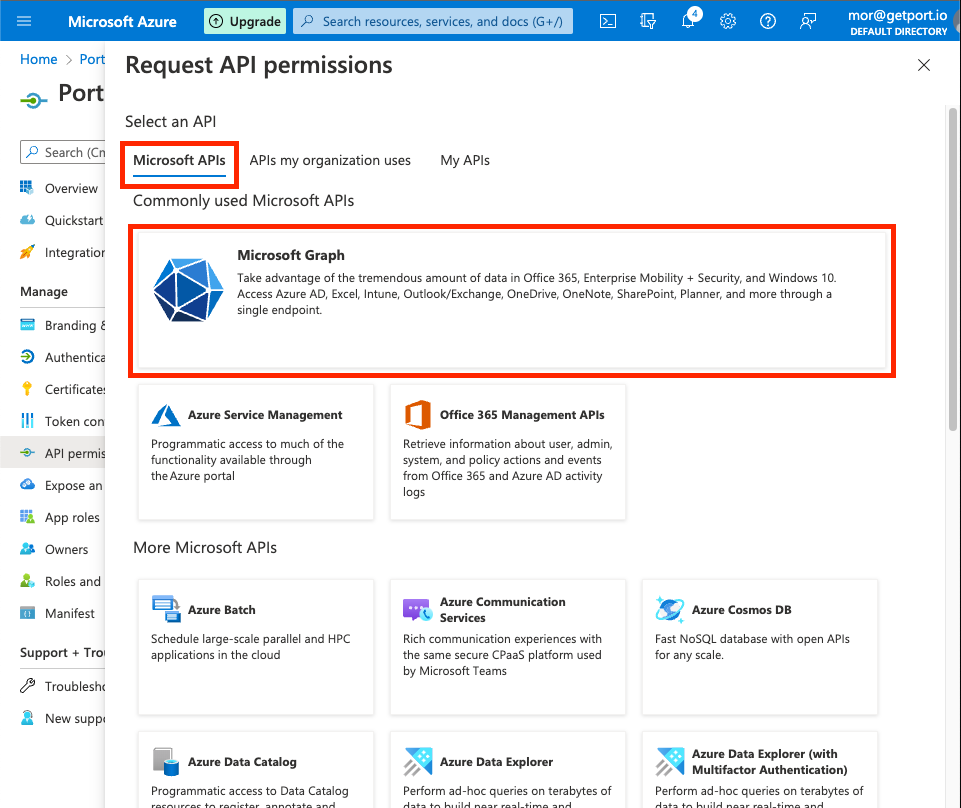 3.2 单击
 Delegate Permissions 3.3 搜索并标记以下权限: -
 email,openid,profile,User.read。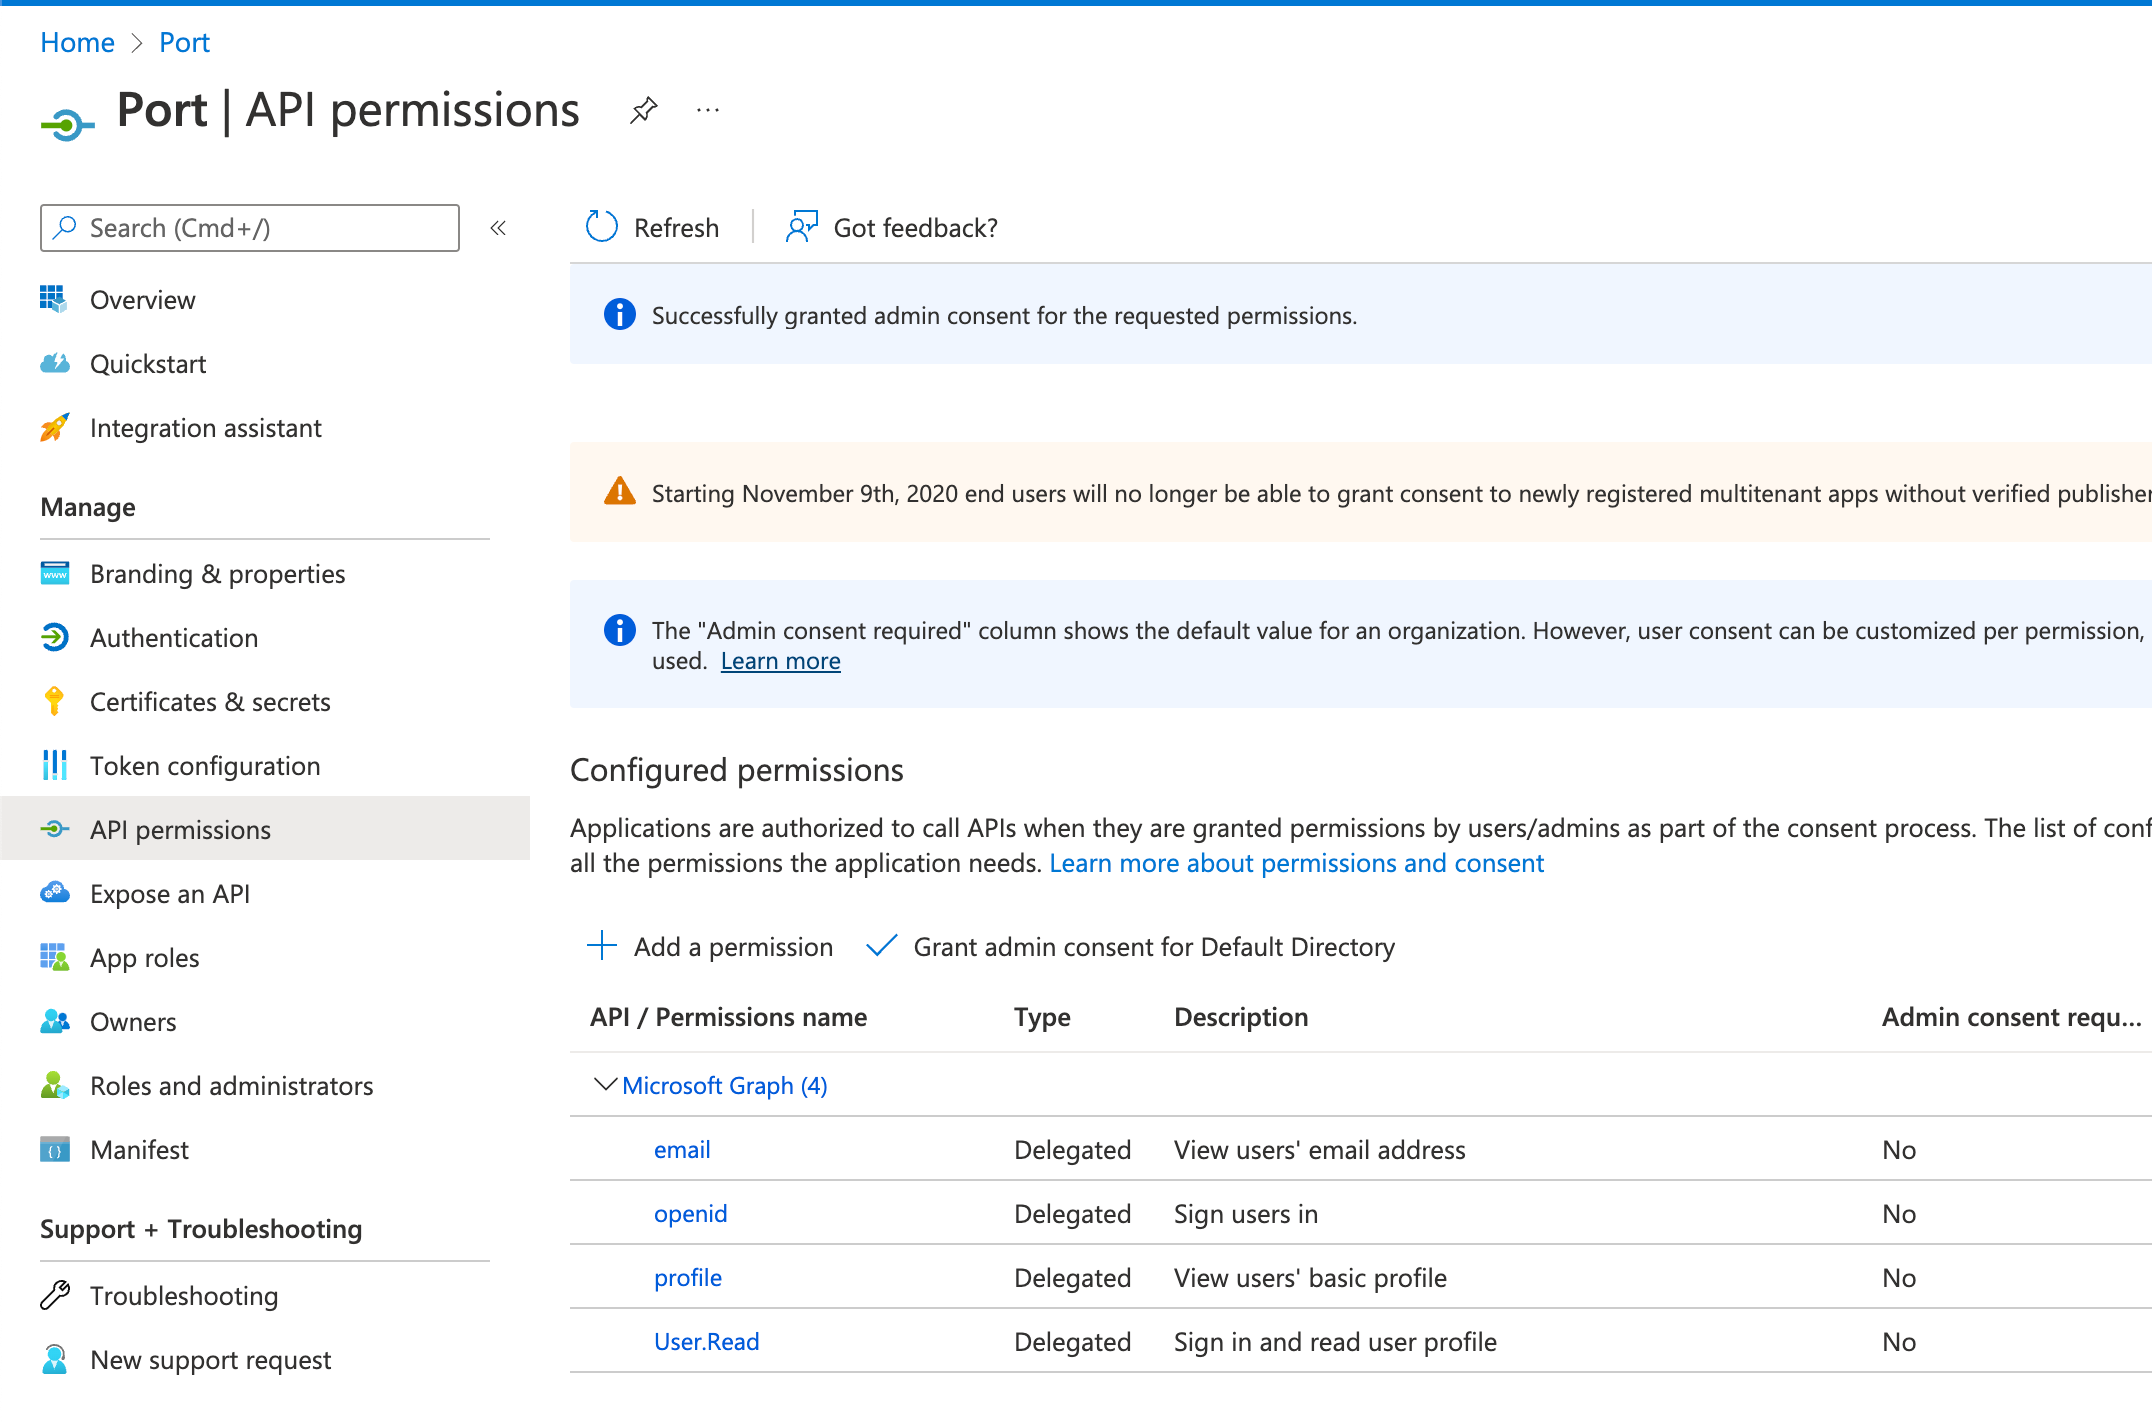 3.4 点击
添加权限。 (可选)授予管理员同意权: 当贵组织的用户首次登录时,系统将提示他们确认此处指定的权限。您可以单击 "授予默认目录的管理员同意 "来自动批准他们的权限。 :::
步骤 #4: 配置应用程序索赔
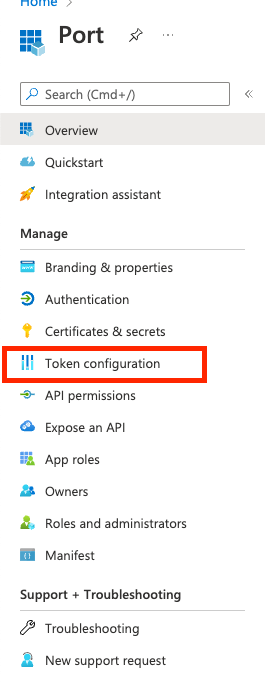
- 在 Port App 页面,点击 "令牌配置":
 2.单击
2.单击 添加可选 claim: 3.选择
3.选择 ID作为令牌类型,然后选择emailclaim,然后点击添加: Azure app token adding a claim :::note 对Access和SAML重复同样的过程(共 3 次)。 ::: 4.您的可选 claims 将如下所示: Azure app permissions summary :::info
如果希望配置groups claims以将您的 AzureAD 组拉入 Port,请遵循How to allow pulling AzureAD groups to Port 。 :::
步骤 #5: 配置应用程序secret
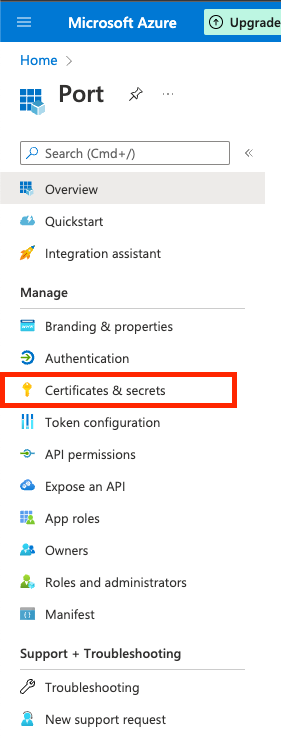
- 在 Port App 页面,单击 "证书和secret":
 2.在 "客户机secret "选项卡上,单击 "新建客户机secret "按钮:
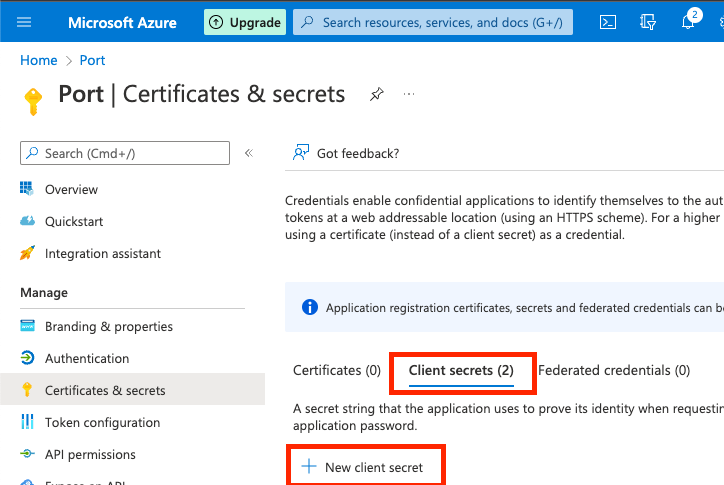 2.1
2.1 描述: 输入secret描述: 例如Port登录客户secret.2.2过期时间: 选择secret的过期时间。 请务必在日历上标记secret的过期日期。必须在过期前更换secret,否则将无法登录 Port。 :::2.3单击 "Add"(添加)。将创建一个secret,其 Values 将显示如下图所示。立即记录secret的值,因为下一步我们将需要它。 ::::danger 现在复制您的secret 请注意,离开此页面后,您的secret将不会再出现。 :::
第六步: 向 Port 提供申请信息
Port 在此过程中需要以下信息:
- 您在Step 5: Configuring application secret 上创建的 "客户机secret "值。
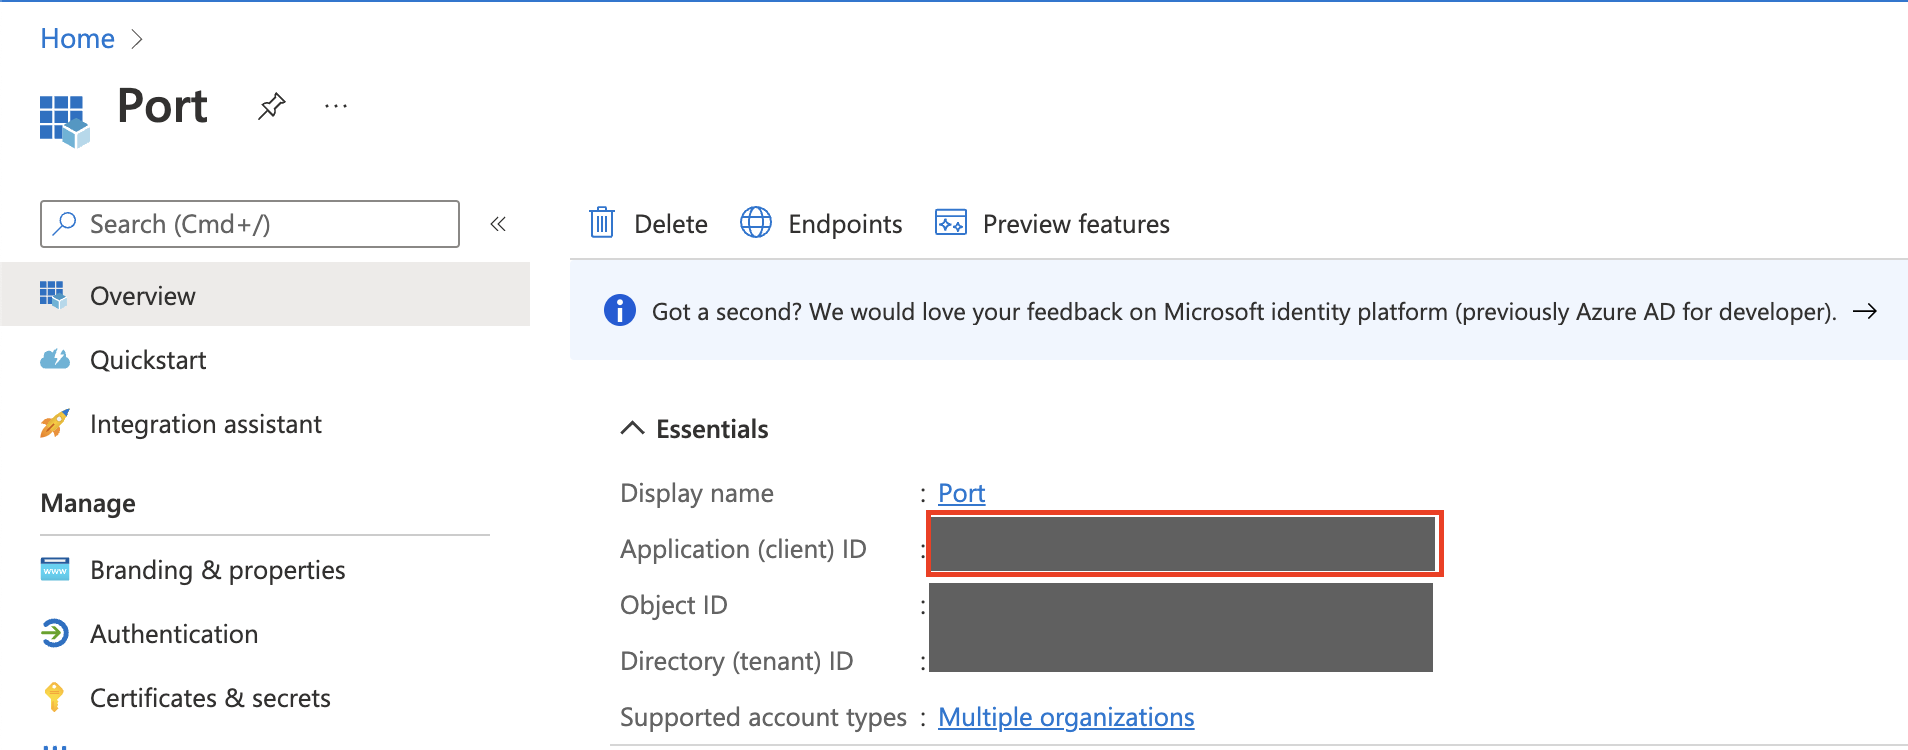
- 应用程序(客户端)ID",显示在Port应用程序概览页面上:
note
Port 将为您提供应用程序主页 URL 所需的 CONNECTION_NAME (如Step 2 上所述)。
第 7 步: 向组织公开应用程序
- 将应用程序分配给组织用户和组
应用程序设置完成后,您可以通过在组织中分发应用程序,将其分配给组织的用户和组: 1.1 转到 "Azure Active Directory".1.2 转到 "企业应用程序": !Azure AD enterprise applications
2.点击 Port 应用程序:
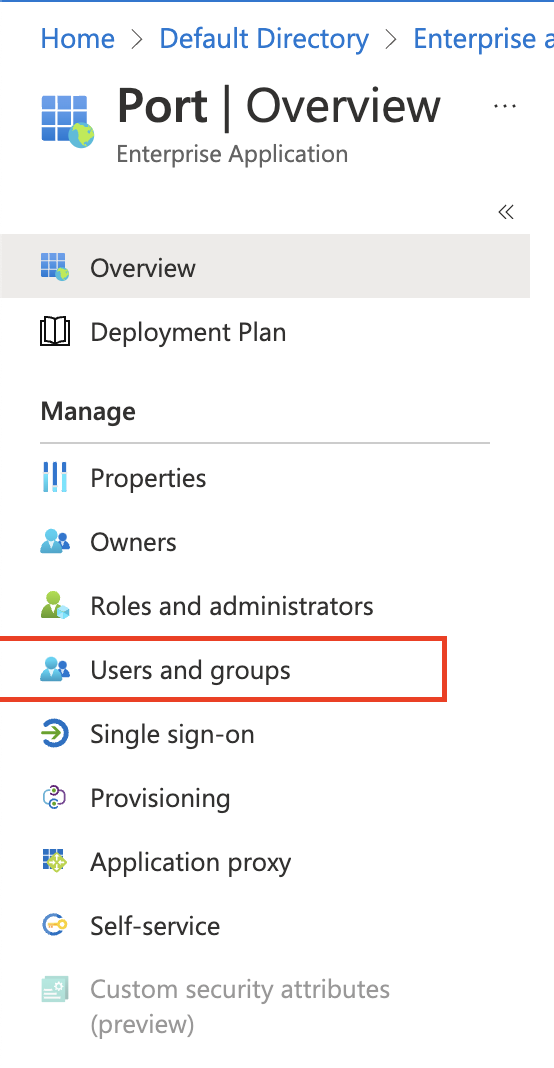
 3.点击 "用户和组":
 4.单击 "添加用户/组":
 4.1 选择要授予访问权限的用户和组 Port.4.2 单击
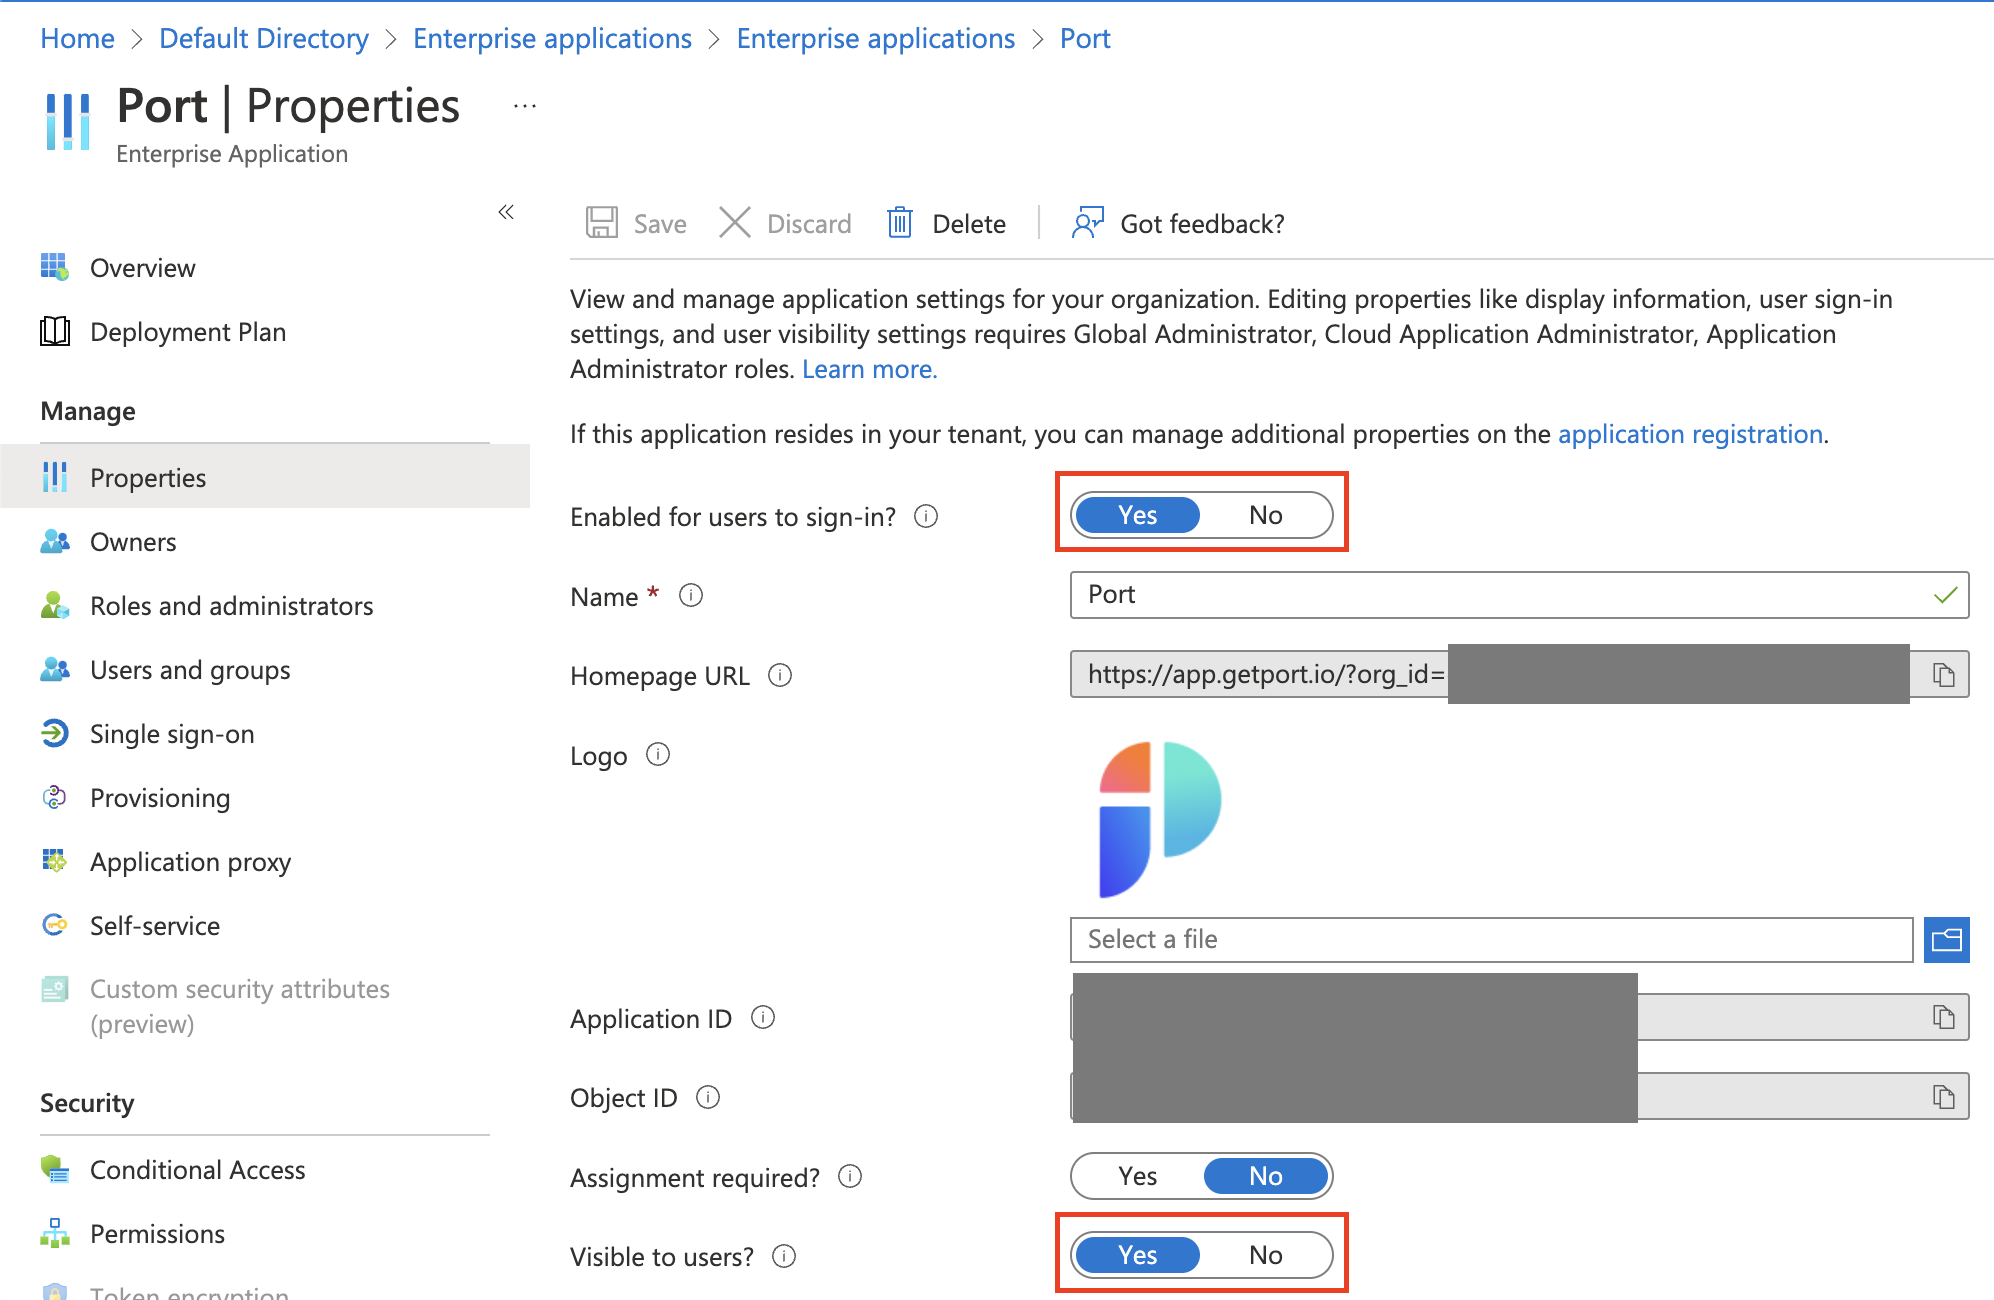
 Assign. 5.使 Port 应用程序在 "我的应用程序 "页面上可见: 5.1 转到Azure Active Directory.5.2 转到Enterprise Applications.5.3 单击 Port 应用程序。5.4 单击Properties: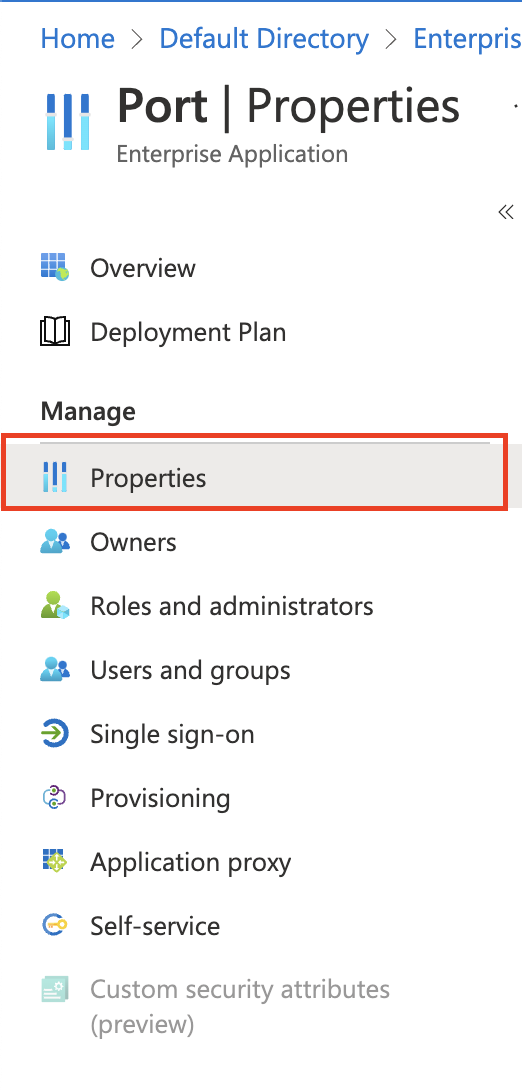 5.5 设置应用程序属性: - 将
 Enabled for users to sign-in?标记为Yes。- 将 "用户可见 "标记为 "是"。
注�意
默认情况下,"需要分配 "flag 设置为 "否",这意味着任何拥有 Port 应用主页 URL 的用户都可以访问该应用,即使该应用没有直接分配给他们。
将该标志更改为 "是 "意味着只有直接分配给该应用程序的用户和组才能使用和访问它。:::
 您应该在https://myapplications.microsoft.com 面板上看到 Port 应用程序:
 :::note
用户也可以通过访问应用程序主页 URL 手动访问 Port: https://auth.getport.io/authorize?response_type=token&client_id=96IeqL36Q0UIBxIfV1oqOkDWU6UslfDj&connection={CONNECTION_NAME}&redirect_uri=https%3A%2F%2Fapp.getport.io`。
:::
- 将 "用户可见 "标记为 "是"。
注�意
默认情况下,"需要分配 "flag 设置为 "否",这意味着任何拥有 Port 应用主页 URL 的用户都可以访问该应用,即使该应用没有直接分配给他们。
将该标志更改为 "是 "意味着只有直接分配给该应用程序的用户和组才能使用和访问它。:::
将 AzureAD 组拉到 Port 所需的权限
Port 可以查询通过 AzureAD SSO 登录的用户的群组成员,并将其团队添加为 Port 内的团队实体。 这样,平台工程师就可以利用 AzureAD 现有的群组和在 Port 内手动创建的团队来管理 Port �目录内资源的权限和访问。
**重要: ** 为了将 Azure AD 组导入 Port,Port 将要求连接应用程序批准 "Directory.Read.All "权限